Feeds:
Posts
Comments

Spring is coming! Yeah, so maybe it’s still cold and rainy and we haven’t seen many springtime ingredients yet. But some nettles are starting to come up, as are some other early greens, both wild and cultivated. And one of these greens is probably right in your yard, if you have a yard, and you probably want to pull it up anyway.

That’s right, it’s dandelion green season. Dandelion greens are best when they’re very young, with thin, narrow leaves growing in a rosette that hasn’t yet produced a flower. They’re slightly bitter in a good way, they’re delicate, and they don’t get slimy like spinach when cooked. They make great pesto too, if you have the patience to pick enough and clean them.

They also go fantastically well with one of the other few things we’re getting already this season: leeks. Sauté the two together in some yellow springtime butter with a little salt, and the leeks get a certain sweetness that perfectly balances the dandelion greens’ flavor. So very tasty.

The result is great on its own, mixed with mild spring cheese, tossed onto scrambled eggs, spooned on top of broiled meats, stuck into the center of buckwheat crèpes… Basically, use it anywhere you’d like a savory flavor. I ate mine with scrambled eggs and a bit of some fresh cheese my friend kindly left in my farmers market bag on Saturday.

It seems silly to write this in recipe form, but here you go.

~

Dandelion and Leek Sauté

Ratio:
Handful of dandelion greens (see notes above)
per every 1 smallish leek

1. Remove roots of leek and outer hard layer(s). Wash well. Slice into thin strips.
2. Heat butter. Sauté leeks on low heat (they burn easily). Add a pinch of salt.
3. Add dandelion greens. Stir until wilted. Taste to adjust salt.
4. Add to any other recipe or eat as is.

Here’s a recipe that will appeal to fans of Thai food, paleo/low-carb eaters, people who want yet another delicious Thai-inspired use for Stokesberry Farm’s ground chicken and local tasty winter vegetables, or anyone who wants to try something new.

Pad woon sen is a particularly delicious Thai noodle dish. Woon sen are thin glass noodles made of rice or bean; in pad woon sen they’re typically stir-fried with meat, vegetables, sauces and egg. I make the dish now and then, or sometimes enjoy it out (Chayo on 15th near Northgate makes a mean pad woon sen). But it is kind of a large tangle of carbohydrates and leaves one a little sleepy. But…

Not too long ago, I was shopping at Madison Market and saw something in the refrigerator case that caught my eye: a package of what looked like woon sen noodles, except they were actually kelp. I couldn’t resist; I bought them.

I kept putting off cooking them. They keep many months in the package and, honestly, since I hadn’t tried them, it felt like a gamble. There were too many nights when I was busy with homework and wanted to cook something familiar and reliable. What if they were terrible, and I had to eat something bad while doing homework, or waste food/time cooking something new? I’d open my fridge it would say, “Make your mother’s roast chicken; it’ll cook while you study.” or “Don’t you want the rest of that onion soup in the freezer? I thought so.”

Note that if your fridge is talking to you, you might want to start getting more sleep.

But my fridge was secretly conspiring with the package of noodles. The fridge slowly talked me into getting all the right ingredients, unaware of what I was doing. And so, yesterday, when I finished a deadline and opened the fridge, I heard: “Look. You can defrost that ground chicken in the freezer. Meanwhile, we have shiitake and oyster mushrooms, carrots, onions, broccoli, spinach, napa cabbage, garlic, eggs, a lime, and those damned kelp glass noodles. Do ANY of these things not go together?”

My fridge had a point. That was pretty much the makings of a perfect pad woon sen. (Also, I really needed a nap.)

I tasted a kelp noodle. It was a little crunchy. I was a little skeptical. But I was done with a deadline, and decided I’d cook this anyway. It only took a few minutes: Throw the garlic and onion in the wok, add some fish sauce (soy or other sauce optional), add carrots, cook till soft, add mushrooms… Cook in the chicken, add the broccoli and cabbage and noodles, add eggs and stir until cooked. Maybe ten minutes.

Reader, I ate it. The kelp noodles lost their salad-like crunchiness in the wok. They were pretty much just like the regular woon sen noodles except less chewy (and woon sen is a little too chewy, if you ask me).

The only thing is, these noodles are made pretty much of water, sodium, and calcium. True, they have almost no carbohydrate (1g) but they have almost no *anything* — which is to say you really want to make this dish with meat or something substantial, or you’re going to be hungry again pretty quickly.

~

Pad Woon Sen (Sea Kelp version) With Ground Chicken, Winter Vegetables and Egg

NB: This recipe is very approximate in ingredients and proportions. You can modify it to taste like any kind of stir-fry you like to make. Fish sauce is essential for Thai flavor, and spices or ginger make a nice addition.

  • 1 package kelp noodles (available at Madison Market and possibly elsewhere
  • 3/4 – 1 lb ground chicken (Stokesberry has this at the U-District and Ballard farmers markets)
  • Assorted winter vegetables (garlic, onion, carrots, napa cabbage, mushrooms — the shiitake and oyster mix from the U-district market worked beautifully, broccoli, etc)
  • 2 eggs
  • fish sauce
  • soy or other Asian stir-fry sauce (optional)
  • coconut oil or chicken fat (schmaltz; Stokesberry has this, although the amazing jar I have is one I got in San Francisco)
  • 1 lime
  • a pinch of sugar (optional; you can also use Thai palm sugar which is not very sweet at all)
  • hot sauce to serve (optional)
  • other flavors, like ginger or hot peppers, as desired


1. In a wok, stir-fry onion and garlic in oil or fat. Add a few dashes of fish sauce. Add carrots and stir.

2. Add a bit more fat/oil and add mushrooms. Cook until they emit liquid.

3. Add ground chicken and any other flavors (ginger, hot chilis, etc) and stir until cooked. You can add the optional pinch of sugar at this point.

4. Add other vegetables and cook for a minute or so.

5. Add kelp noodles and a little more oil/fat. Stir to combine.

6. Make a hole near the bottom of the pan for two eggs, and crack eggs into it. Let them cook a minute undisturbed, then break them up with your spoon and stir them throughout.

7. Add lime or any other flavors (taste and adjust), stir, and serve hot.


Mini Quiche Cakes

This recipe happened by accident.

Here’s what I was going for: I’ve been making quiches with alternative crusts. Sometimes frittata-style/crustless, sometimes gluten-free, often nut-based. Recently I made a quiche whose crust was made of thinly-sliced potatoes (you could also use sunchokes) that I’d layered throughout the pie pan bottom and sides, covered in olive oil and a little salt, and pre-baked before adding the quiche filling and baking again.

Some of the potatoes were colorful deep purples and pinks. I wondered, what if I made the same thing, but in ramekins? Could I turn it upside down and get a little quiche dome coated with a thin dome of nicely-colored potatoes?

It turns out the result if you do that doesn’t work very well; it’s better to leave the quiche in its container, because the potatoes don’t hold a great shape.

But. BUT!

I had some left over little bits of potato, so I made a few ramekins where the potato slices were placed with a bit more space in between them, allowing quiche filling to come through. The result? These nice little cakes, browned at the edges, cheesy on the bottom, and full of quiche deliciousness.

Great brunch food. You could probably also reheat these for a few breakfasts.

~
Mini Quiche Cakes

makes four ramekins

  • a few very small, colorful potatoes
  • 4 ramekins or ceramic baking cups
  • 2 eggs
  • ~ 1/3 cup cream
  • 1 egg
  • 3-4 mushrooms sliced or chopped
  • small handful italian parsley chopped fine
  • other greens (spinach, kale, collard) chopped fine
  • cheese (gruyere, swiss, cheddar) grated
  • salt, pepper and nutmeg to taste
  • a teaspoon of flour (I use rice flour. This is optional)
  • olive oil
  • butter


1. Preheat oven to about 385 (somewhere in the 375-400 range depending on your oven)

2. Slice potatoes into thin pieces and cut the slices so they’re about an inch across. All shapes are fine. In a bowl, coat these slices with olive oil and sprinkle salt on them. Arrange the slices in the ramekins, on bottoms and sides. Allow space between them.

3. Gently place ramekins in oven and bake until potatoes soften, probably about 10-15 minutes. If some slices have fallen off the sides, gently put them back in place.

4. While the potatoes are cooking, start your filling. Slice onion thin and cook it slowly in butter with a little salt until all pieces are either browned or clear.

5. Add a little more butter and olive oil, and add your mushrooms, letting as many slices touch the pan as possible. Turn when browned, and cook until they release liquid.

6. Add parsley and stir for a minute. Add greens and cook until done.

7. Flavor: Add nutmeg, pepper and salt to taste. Also, add the teaspoon of rice flour and stir well. This helps it stick to/combine with the egg later.

8. In a bowl, whisk eggs with cream. Add a pinch of salt and a little more nutmeg. Mix in your vegetable filling.

9. Pour the filling into the ramekin cups, taking care not to knock all the potato bits off the sides. Grate cheese on top, which will become the bottom.

10. Bake until done, about 20 minutes. Let them cool slightly before running a knife around the sides and turning them onto a plate.


Enjoy!

More pictures of the successful cakes:

Here, on the other hand, is what happens when you try to coat the ramekin fully with potatoes:

Better to leave these experiments in their containers. 🙂


Today (starting last night) is an obscure Jewish agricultural holiday called Tu B’Shevat. It’s literally the New Year for Trees. Way-back-when, people needed a date to restart the agricultural calendar each year, and this date was chosen, being around the time of year the almond trees were in bloom.

A lot of modern sustainability-focused Jews celebrate Tu B’Shevat as an ecological holiday, a chance to talk about issues like land use, climate change, forest preservation, or sustainable food. For the last two years, I’ve hosted a seder and meal focusing on local foods.

The traditional seder includes the seven species of Israel, as well as fruits with small and large seeds, to represent the usefulness of different kinds of deeds. For our seder, we added the (very traditional, dating back to as long as a year ago!) seven species of the Pacific Northwest: salmon, huckleberries, nuts, greens, apples, honey and wild mushrooms. You could certainly argue for other items to be included on that list, but it IS January.

Oy, January. There are, of course, no almond trees in bloom in Seattle. This is a cold, wet time of year, when local vegetables make themselves scarce and local residents hibernate. If anything, that almost makes it a better time of year to have a local foods feast. Everyone knows the Northwest grows a lot of great produce in July, but there’s an assumption that eating local foods in January means basically gnawing miserably on an old, wrinkled turnip.

But instead, with a little help from frozen, preserved, and non-local ingredients (some spices, olive oil, a little grain, a little lemon, etc), we managed to produce: Broiled salmon, mushroom-bean cassoulet, leek-mushroom quiche, roasted brussels sprouts, salad with pears and hazelnuts, cabbage salad, potato-onion gratin, butternut-apple soup, apple-cranberry cake, mixed berry crisp.  I think that’s it. A bunch of wine too, of course. The meal had to be vegetarian/fish only for kosher rules, or the menu could have been even larger with the addition of red meat and poultry.

So, hooray for an agricultural holiday giving us an excuse to enjoy some of the best things possible: the company of friends, the food of the place we live, the chance to reflect, the delight of leftovers.

Friends and blog readers may remember that my grandmother was braving pancreatic cancer these last few months. She left us last Thursday. My heart is pretty torn up about this, even if my mind knows all the right things: that I’m so lucky to have had such a wonderful grandmother, that it is better she is no longer in pain, that she went the way she wanted (at home, in full control), that she’ll always be a part of me.

What can I say? I’m human; I wanted her here forever. I wanted her here for every rite of passage I go through, every meal I cook, every moment I feel a need to call and cheer her up or be cheered or find out what amazing foreign film she’s discovered that I need to see. I’ll always grieve her, and I’ll always remember her. And I’ll do my best to keep her alive as part of who I am. To honor her generosity, her honesty, her love, her passion for living, for justice and arts and reading and learning and ideas…

My grandmother was never interested in doing things half-assed. Her most treasured recipes reflect this. Her recipe for blintzes is a fine example, with detailed instructions that, she always said, most people wouldn’t bother to follow, but must be followed for the end result to be perfect. You have to press the cheese, for instance, through a wire sieve/strainer with holes larger than is found on those typically made these days. Otherwise the consistency is wrong.

My grandmother believed in sharing recipes. I posted this one a long time ago (on the old blog), but I’m sharing it again to honor her memory. Here are very detailed instructions on how to make the world’s most delicious blintzes. If you make and enjoy them, think of the remarkable woman who took the time to create this recipe, who loved feeding and nurturing others, who knew that living life means being engaged with it fully, learning as much as possible, and trying to do the right thing.

I’m spending the week with family and old friends as my own version of sitting shiva, or mourning.  As I travel, her wide-holed strainer and her blintz pan are in my suitcase.

~

Grandma’s Extraordinary Blintzes

Leaves/Wrappers:

  • 4 eggs
  • 1 cup flour* (Note: I usually present gluten-free recipes.  This recipe follows her original instructions, but soon I’ll be working on a gluten-free version.  I’m guessing that a fine-ground rice flour, such as sweet rice flour, with a tablespoon of arrowroot powder will work.  For low-carb/low-grain eaters, each blintz actually has very little flour). *UPDATE 6/7/11: substitute 2/3 cup tapioca flour and 1/3 cup fine white rice flour for a gluten-free version. It works beautifully!
  • 1/2 teaspoon salt
  • 2 teaspoons sugar
  • 2/3 cup whole milk
  • 1/3 cup skim milk or water (Note: You probably know I think skim milk is a terrible idea, but she said they’re too heavy if it’s all whole milk.)
  • 2 teaspoons melted butter

.

FILLING:

  • 8 oz cream cheese
  • about 1/2 – 3/4 lb farmer cheese
  • about 3/4 cup cottage cheese
  • 2 eggs
  • generous pinch of salt
  • 2 teaspoons sugar

~

Make the batter for the leaves/wrappers in advance and let it sit overnight.

1. In the blender, combine dry wrapper/leaf ingredients and eggs. Add milk. Do not add melted butter yet; you don’t want it to sit overnight. You’ll add it in when you’ve taken the batter out of the fridge to use, and let it turn to room temperature.  Cover batter and refrigerate.

2. For the filling, you want to find a way to fluff up the farmer cheese and cream cheese. My grandmother took a wire strainer with larger spaces between the wires, rather than the normal fine-mesh kind, and smushed first the farmer cheese and then the cream cheese through the strainer with a wooden spatula. It takes a while, but it actually makes the cheese the right consistency. Where you’ll find a strainer like that, I have no idea. I just work here.

3. Mix together the fluffed cheeses. Add the eggs, salt, and sugar and stir.

4. To make the leaves, heat a small, thick crepe pan – hers is about 6” wide. Melt butter into it and leave the flame at medium-low. Pour in some of your batter, swirl it around, and immediately pour the excess back into your container. Wait a moment, and run a butter knife around the edges, then turn out the leaf onto an overturned shallow bowl. Do not cook the other side. Repeat for all of your crepes.

5. To assemble, place each leaf cooked side up on your work surface. Add a few tablespoons of filling, and fold them into squares with the uncooked side of the crepe on the outside, and
each of the four edges folded in. “Like pocketbooks,” my grandmother explained several times. I’m still not sure what that means.

NOTE: If you want to freeze them, this is the ideal stage to do so. Wrap them flat (not layered) in aluminum foil, and freeze them until you’re ready to fry them. This recipe makes about 20 blintzes, so it’s enough to freeze if you’re not feeding a group.

6. When it comes time to fry them, defrost your packets if you froze them. Heat butter in a heavy frying pan until the butter is golden brown and tiny bubbles appear. Turn the heat down to low or medium-low and place the blintzes folded side down (because that side is thicker) in the pan for about five minutes.

7. When the bottoms are nice and brown, turn the blintzes over for a few more minutes. They should be browned on both sides. Work gently with a spatula, because they tear easily. When they’re done, gently place them on plates. It’s traditional to serve blintzes with sour cream, and also with some fruit.

~

This was my grandmother making blintzes a few years ago:

[Okay, so technically food justice starts with “fo” but this looks like a fantastic event for a good cause.  Details below!]

~

Food Justice Starts with Us! — A benefit event for Clean Greens Farm & Market

Saturday January 29th 2011, doors open at 5:30pm
@ Garfield Community Center, 2323 East Cherry St. Seattle, WA 98122
Tickets $35, can be purchased at http://www.brownpapertickets.com/producer/25870

.

From the organization:

“Clean Greens Farm and Market is happy to announce our first annual ‘Food Justice Starts with Us’ Dinner Event, taking place on Saturday, January 29, 2011. The goal of this event is to raise funds for Clean Greens’ food justice projects, as well as to raise awareness of the food access issues that our local communities face.

For our first-ever fundraising event, we will be serving a meal cooked with local, seasonal foods by members of the Clean Greens community. Clean Greens welcomes Brahm Ahmadi, co-founder of People’s Grocery in Oakland, CA, who will be giving a keynote on Oakland’s food justice movement. Towards the end of dinner, a short film on Clean Greens’ ongoing food justice work will be premiered. After dinner, we will be having a dessert auction, and guests can enjoy their dessert while listening to a local jazz band perform.

Founded in 2007, Clean Greens is a food justice organization that is owned and operated by residents of Seattle’s Central District. Our mission is to decrease the incidence of disease in our communities by increasing residents’ access to healthy, pesticide-free produce at affordable prices. We are committed to delivering clean produce to all people in our communities, which we grow on our 22-acre farm in Duvall, Washington, and distribute via our Central District farm stand and CSA program.

We hope you will join us for dinner on January 29th, to learn more about the food justice efforts of Oakland and here at home because ultimately, Food Justice Starts with Us!”

It’s wintertime, and the weather’s been unusually cold.  This is not, traditionally, the season when a young (wo)man’s fancy turns to orchard-keeping and permaculture.

But why not?  Start thinking now about that new chicken coop you want to build, what to do about that homely apple tree in your yard, and whether maintaining a thriving beehive would give you the double benefit of providing free honey and drowning out your neighbor’s kid’s tuba practice (it probably won’t; sorry). Spring is, we like to think, not too far off.

~

Here are a few upcoming classes from City Fruit and Seattle Tilth.

The headings for each category link to the organization’s page for registration information.

~

Seattle Tilth Urban Livestock Classes

Backyard Beekeeping 101 (Good Shepherd Center; 4649 Sunnyside Ave. N., Room 107, Seattle, WA 98103, from Jan 15, 2011 10:00 AM to Jan 15, 2011 12:00 PM)
Learn the fundamentals of beekeeping!
Starting With Baby Chicks (Good Shepherd Center; 4649 Sunnyside Ave. N., Room 107, Seattle, WA 98103, from Jan 15, 2011 02:00 PM to Jan 15, 2011 04:30 PM)
Learn the most important considerations in caring for baby chicks.
Backyard Beekeeping 101 (Good Shepherd Center; 4649 Sunnyside Ave. N., Room 107, Seattle, WA 98103, from Jan 29, 2011 10:00 AM to Jan 29, 2011 12:00 PM)
Learn the fundamentals of beekeeping!
City Chickens 101 (Good Shepherd Center; room 107, 4649 Sunnyside Ave. N, Seattle, WA 98103, from Jan 29, 2011 02:00 PM to Jan 29, 2011 04:30 PM)
A comprehensive introductory course for those interested in keeping chickens and want to start with adult birds.

~
City Fruit Orchard, Permaculture and Beekeeping Classes

Fruit Tree Biology and Orchard Management

Saturday, January 15, 10 am – noon
Phinney Neighborhood Association: 6532 Phinney Ave. N, Seattle, WA 98103

Understanding the basic systems of a tree –its root, vascular, and photosynthesis/leaf systems—helps you better care for your trees and produce healthier fruit. The class covers basic tree biology and orchard management month by month—when to prune, thin, manage pests, etc. Finally, the class discusses orchard safety (especially ladder safety) and basic tools and equipment. Ingela Wanerstrand, is the owner of Green Darner Garden Design, specializing in edible garden design. Ingela has been pruning fruit trees professionally for 15 years, works with the Friends of Piper’s Orchard and Plant Amnesty, and receives high marks for teaching.

Mason Bees for Pollination
Saturday, January 29, 10 am – noon
Phinney Neighborhood Association: 6532 Phinney Ave. N, Seattle, WA 98103 (location tentative)

North America is in the midst of a pollination challenge with the honeybees; our fruit and garden crops suffer as result. Native, non-aggressive mason bees can dramatically increase fruit yields while improving the entire city ecosystem. Take action on the pollination challenge in your neighborhood by learning to manage mason bees. In this class, you’ll learn how to be successful in raising mason bees, you’ll see fun techniques to try in your yard, and you’ll receive hands-on experience with harvesting mason bees. Instructor Dave Hunter has been working with mason bees for nearly 20 years. He has been partnering with US scientists, University researchers, the ARS/Logan Bee Lab, and multiple experts across the country to help gardeners become more aware of their pollination requirements. He recently opened the website www.crownbees.com to assist gardeners with successfully raising mason bees.

Fruit Tree Pruning Basics

Saturday, February 5, 10 am – noon
Phinney Neighborhood Association: 6532 Phinney Ave. N, Seattle, WA 98103

Regularly pruning fruit trees improves their overall health, appearance, and can even increase fruit production. In this beginner class, learn the biology behind pruning fruit trees, practice basic pruning cuts, learn about pruning tools and get hands-on experience pruning a fruit tree. Bill Wanless is co-owner of brooke/wanless gardens, specializing in pruning of small trees, shrubs and vines. He is an ISA-certified arborist with 20 year’s field experience.

Planting and Caring for Young Fruit Trees
February 19, 10am-noon
Martha Washington Park (Location Tentative)

Before you get your fruit trees at the nursery this winter, come learn how to choose the right tree and the best planting and care techniques to give your trees a head start. This popular class covers site selection, considerations in selecting trees, how to plant them and how to care for young fruit trees. You will get hands-on experience planting a tree, so dress accordingly. Jana Dilley works on the Green Seattle Initiative with the City of Seattle Office of Sustainability and Environment. She has a master’s degree in Forestry and in Public Affairs and has organized community tree-planting events in Seattle and California.

Pruning Fruit Trees to Produce More Fruit

Saturday, March 5, 10 am – noon
Jackson Place Co-housing: 800 Hiawatha Place S, Seattle, WA 98114

Learn the biology behind pruning fruit trees and get hands-on demonstrations of how to clean up old trees, how to train very young trees, and how to prune to produce more fruit. Jackson Place Co-housing grows apples, pears and plums in a highly urban environment and has both well-established and very young trees.

Grafting New Fruit onto Existing Fruit Trees

March 12, 10 am – noon
Bradner Gardens Park classroom: 1733 Bradner Place S, Seattle WA (Location Tentative)

This course provides an introduction to the whip graft, cleft graft, bud graft and pleach. You can practice grafting and learn the in’s and out’s of rootstocks. Instructor Greg Giuliani grew up on a Snoqualmie Valley farm with a 1930’s orchard. He learned how to graft in order to re-create these heritage fruit varieties, not available in stores. He has been a member and instructor with the Seattle Tree Fruit Society for twelve years.

Permaculture and Orchards

Saturday, March 19, 10 am – noon
Phinney Neighborhood Association: 6532 Phinney Ave. N, Seattle, WA 98103

In this hands-on class, learn permaculture best practices for planting and maintaining healthy fruit trees. The class will discuss how to establish “plant communities” (also known as permaculture plant guilds) that activate the soil, support the ecosystem, and promote low maintenance tree health. We will also cover sheet mulching and companion planting. Co-instructor Jenny Pell is a permaculture teacher, designer and consultant specializing in urban permaculture, edible perennials and vertical gardening. Details about her projects are at www.permaculturenow.com . Jacqueline Cramer has worked the land for twenty years as farmer, teacher, gardener, designer, and activist, and has worked in urban settings designing, installing and maintaining landscapes, including over 15 school food gardens.

For those of you who haven’t heard, the FDA has also shut down the business of long-time local raw milk cheese maker Sally Jackson (Seattle Times article here). It’s a shut-down with controversies about E. coli and cleanliness, but I’m going to put that particular discussion aside here, since the debate is already taking place in various other places online.

Instead, I’m trying to think about the big picture of how we prevent this from happening to small farms and cheese makers, whether you think the fault lies with the FDA, with food producers themselves, or in some more nuanced combination, depending on the individual case. Perhaps there’s a more systemic way we can look at this.

Whatever your position, the loss of a business like Sally Jackson’s is sad. It’s sad for her; it’s hard to make your livelihood running a small food operation in a country of giants, to take that risk with your financial future. Also, for the rest of us, her cheeses were delicious. She was making artisan cheese when the idea wasn’t even a twinkle in this locavoracious community’s eye. Compared to, say, Europe, we don’t have enough makers of artisan cheese to go taking them for granted (not that we should even if they were plentiful).

Perhaps those of us who agree that it’s sad to lose small, artisan producers can think about solutions together. We have common ground, whether you feel farmers/food producers are getting a raw deal, or whether you believe the result is sad, but the producers may have made mistakes.

The idea I’ve been thinking about: Some form of legislation that would help small producers when this happens, such as a financial allotment to remedy the situation when a producer below a certain size is subject to an FDA recall. The real barrier seems to be financial. If the FDA recalls a product for a large corporation, the corporation has enough funds to take a quick loss, fix the problem, and stay in business. But for a small producer, a recall of tens of thousands of dollars in cheese sounds pretty terrifying.

If we can agree that in general it is a good thing for the country to have small, unique producers as well as giant food corporations, such a bill would help preserve that idea. Yes, sometimes funds would go to small producers who made mistakes or perhaps even took careless risks with the public’s health. But this idea is about both helping families running small businesses and helping us continue to be a country where small producers can actually do business. For those of us who believe in that goal, helping any small producer is valuable. Otherwise, who’s going to take the risk of starting a new family dairy farm or cheese-making operation?

Not everyone agrees America should have small producers. There are a lot of corporate dollars influencing government in this country, obviously. But it’s an idea that attracts people from all over the political spectrum, from the far left to the far right. I’d be interested to see who would get behind it.

Thoughts?

~
Credit to Stephanie Kilgast for the flickr Creative Commons photo

A childhood friend, chef Peter Shelsky, tipped me off to a program on New York’s public radio station WNYC this morning, as thanks for tipping him off to my favorite restaurant in New York.  My favorite Egyptian chef, Ali El Sayed from said restaurant — the Kabab Cafe on Steinway Street in Astoria (Queens) — was going to be on the Leonard Lopate show talking about Egyptian food, Peter said.  The link is here.  The problem is, I’m now craving this food again even though I was just in New York, and eating there, a week ago.

I also just found this recent PBS video interview with him too.

Ali is not just a genius with ingredients, he’s delightful to listen to, especially when he talks about food (although he has plenty to say about art and life and culture too). Whenever I visit New York, I make it to his itsy-bitsy restaurant and perch at a table with my friend Karyn, chatting with Ali while he tells us things like, “When you make falafel (out of favas!), you should behave like you’re making a soufflé. They’re very delicate.” Indeed, his falafel are light and flavorful and addictive. He makes lamb stuffed with ground lamb and ground nuts and spices, lamb chops with pomegranate sauce, gorgeous chickens, and exquisite-yet-simple desserts (I still drool when I think about the blueberry clafoutis I had the first time I went there).

I don’t normally write about restaurants, and this place isn’t even in Seattle. But listen to the interview with Ali, especially if you’re inspired by people who love food, by the history of food, or by the idea of making something tasty in your own kitchen. And if I work out a recipe for stuffed lamb or good falafel sometime, I’ll let you know. But I may not need to; Ali is writing a cookbook. And when it comes out, I might be in danger of not leaving my kitchen for a month.

Image courtesy Facebook.

Latke Art

Since Hanukkah is early this year, latke season is coming up!  Here and here are some past posts on oils to use for frying.  I still haven’t tried the macadamia nut oil a few commenters suggested, but am interested in it.

Here, however, are some latke-related mash-ups I put together in a bout of pre-Hanukkah procrastina– er, creativity. You can click on them for full-size images.


[Edited to add: Per request, I added a few of these to greeting cards and aprons in a Zazzle online store here: http://www.zazzle.com/seattledebs]

~

Oily Night

Dali’s Deli

American Non-stick

Latke Thrower

Mona Latke

A kugel, for those who don’t know, is a casserole with a self deprecating sense of humor. A Jewish traditional baked starchy pudding dish often made of noodles or potatoes, the name has roots in common with Yiddish words for “ball” and “bullet” possibly to signify the cannonball-like feeling it leaves in the stomach. There are less-starchy kugels, of course: those with plenty of meat or onions or fat or crispy chicken skin.  The kugel wears many hats. It’s used to this. Change the kugel a bit and it’ll just shrug and ask, “What am I, chopped liver? That I should care?”

Even for a dish so varied, I take a pretty liberal interpretation of kugel. My kugels generally contain no noodles, sometimes no potatoes, and generally lots of cream and saffron. This kugel, coming out of my oven during the Thanksgiving season, has cauliflower, cream and even… cranberries.

Cranberries? Why not?! There’s a reason cranberries taste so good with traditional Thanksgiving foods: the tartness makes the savory flavors feel fresh and contrasty. A few cranberries thrown into an apple pie improves it. Throw a few in the kugel too.

This kugel, as I believe a kugel should be, is flexible. I threw some potatoes in it, but you don’t have to. You can increase or decrease the brussels sprouts or mushrooms. And the onions… well, I actually started out cutting three large onions for two dishes and then, in my flu-bleary state of mind, canceled one dish but forgot to decrease the onions.  The result was delicious.

~

Thanksgiving Kugel with Cauliflower, Brussels Sprouts, and Cranberries

  • 1 head cauliflower
  • 1/2 pound or more brussels sprouts
  • 1/2 lb potatoes or winter squash or more cauliflower
  • 1-3 thinly sliced or chopped onions (see above)
  • thinly sliced mushrooms, to taste (a handful, a pound, whatever)
  • 1-2 handfuls of cranberries
  • cream
  • saffron
  • butter and/or schmaltz
  • olive oil
  • salt
  • pepper

~

1. Preheat oven to 400-415F. Chop up the cauliflower and potatoes or squash. Remove brussels sprouts’ stems and outer leaves, and slice them in half.  Arrange all of these ingredients in a large casserole pan, like a rectangular Pyrex.  Coat with olive oil, salt and pepper.  Roast until not yet very soft and browned at the edges, stirring occasionally.  While this is roasting, start the onions in step 3.

2. When that’s nearly done roasting, add your cranberries, stir, and put it back into the oven. The cranberries will roast pretty quickly.

3. In a very large pan, heat butter, schmaltz, olive oil, or some combination thereof.  Add onions and salt and cook slowly until they’re completely clear and browned.

4. Remove from pan, add more fat, and cook the mushrooms, not crowded in the pan — do several batches if necessary– until they brown a little and release their juices.  Make sure there’s enough fat in the pan for them; the pan shouldn’t look like a desert and the mushrooms shouldn’t wither.

5. When all the mushrooms are done, add the onions back to the pan with all the mushrooms, and add some cream and a pinch of saffron.  Stir, letting the flavors bubble together, and adjust salt to taste.

6. When everything in the oven is done roasting, stir the pan ingredients with the roasting ingredients, press into the casserole pan, add more cream if desired, and bake until the top is golden-brown.

This one is for the paleo eaters, the cauliflower enthusiasts, or just anyone looking for a simple flavorful fall/winter dish that works for a variety of meals. This would be great for Thanksgiving.

Cauliflower is a pretty classic grain-substitute for people who avoid grains for health reasons.  It’s bulky, low in carbohydrates, and a good absorber of sauce. It has a nice, nutty flavor, but not so strong that it overpowers whatever it accompanies.  Cauliflower is gracious like that.

Roasting cauliflower, like brussels sprouts, tends to be a good way to attract the skeptics and convert the cauliflowerphobes.  Roasting brings out flavor and leaves appealingly browned florets and soft, steamy stems.  You can roast cauliflower on its own and serve it with salt and pepper, butter or olive oil, parmesan cheese, parsley, lemon juice, etc.

My aim: Make a cauliflower pilaf, treating the vegetable like rice.  Mix it with well-browned onions.

Result: Success!

This came out just like I wanted. I’ve eaten it so far as a side to roasted chicken with sauce, on its own, fried in butter with eggs for breakfast, and tossed with sautéed mushrooms and kale with lots of parmesan and black pepper for dinner.  Cauliflower pilaf is a keeper.

~

Cauliflower-Onion Pilaf

  • 1 head cauliflower (white or yellow)
  • olive oil
  • salt
  • butter and/or schmaltz (chicken fat)
  • 1 large yellow onion

1. Heat oven to 450F.  Chop cauliflower small.  Keep florets separate from stems, and cut stems into very small pieces.

2. In a large cast iron pan or a deep baking tray, spread cauliflower pieces so they’re all exposed.  Coat with olive oil and sprinkle with salt.

3. Roast until browned (time will vary depending on size of the pieces and how hot your oven really is.  I did this while I was cooking a chicken anyway).  When the cauliflower is cooked (very soft with browned edges), take it out of the oven.  Using a knife, like a big chef’s knife or rectangular chopping knife to chop it up.  You don’t want to mash it, you want it in small pieces like rice, and this cutting is easiest when the cauliflower is hot.  Chop until it’s small or you’re sick of chopping.

4. Slice an onion very thinly, into strips about an inch or two long.  Heat a very large skillet (I used the same large cast iron skillet for both the cauliflower and the onions, just waiting until the cauliflower was done first).  Add butter and/or schmaltz and let it heat up a moment/melt.

5. VERY SLOWLY cook the onions in this pan.  I heated the onions up at first, added some salt, and stirred the onions around for a minute or so, and then turned my burner down to very nearly its lowest setting.  I left the kitchen and did homework, checking the pan every 5-10 minutes and giving it a stir.  You want the onions to burn but not brown.  If you’re worried about leaving them unwatched, get a stool and a book and perch near the onions.  You don’t want to get impatient and hurry them into cooking.

6. Meanwhile, the cauliflower has been drying out a bit, which is great.  When your onions are done, stir the cauliflower bits into the onions and mix well.  Adjust for salt and serve.

~

SERVING NOTES:

~ You can reheat this in a pan or microwave.  For a pasta-like meal, sauté some mushrooms in butter, add finely chopped greens (like red kale) and cook until wilted, and then add leftover pilaf and stir.  Grate parmesan or similar cheese on top liberally, and add lots of black pepper.

~ This is a great side dish for chicken or meats. It absorbs sauces nicely.

~ It also works well for breakfast: Heat a lot of good butter, crack in an egg, break the yolk, and stir. Then sprinkle on a cup of the pilaf and mix it in. So good!

Smell Your Carrots

There are foods you (probably) know to choose by smell.  A good cantaloupe, when perfectly ripe, releases a melony fragrance, especially from the navel where the stem used to connect.  Ripe strawberries call out, “You wrote me into your food budget this week, remember?  Really, you did!  You just spelled me e-g-g-s.”  And you’ve probably bought your share of prepared food because the smell from a street stand, restaurant or bakery was overpowering.

Why not vegetables?

For the last two weeks, I’ve been buying carrots from Whistling Train Farm, which is run by Mike Verdi, son of the late Queen of Pike Place Market, Pasqualina Verdi.  Mrs. Verdi was famous in her day for, among other things, handing carrots to small children who came by her stand at Pike Place.  I was one of those children, and my mother insists the carrot incident was a defining moment in my life, the reason I eat the way I do today. I’m happy to give Mrs. Verdi credit.

Fast forward to the carrots I’ve been buying from her son. They’re outstanding. Sweet, flavorful, crisp, fresh.

How did I know they’d be so good? Not just because this farm produces such high quality produce, or because this carrot’s great-great-great…n(great) grandparent changed my life. I smelled them. Perfect carrots smell amazing. Like perfume rabbits would spray on themselves to attract mates if they weren’t already so good at, well, mating. Perfect carrots smell like spring, like sweetness in the back of your throat, like everything a carrot seed dreams of growing up to be.

Smell your carrots, folks. If they smell good, they’ll taste good.

A friend was cooking with me the other day, and I handed her a piece of a carrot. “Wow,” she said. “That’s sweet. Like candy.”  It was unlike carrots she’d tasted before, and she was delighted. Somewhere, Pasqualina Verdi was pleased.

Okay, food confession time: I used to be a vegetarian.  A pretty bad vegetarian — what kind of nice, Jewish girl from New York could resist lox and whitefish on a visit? — but a vegetarian all the same.

Today, we’re going to meet the food that undid my vegetarianism once and for all.  Readers, meet gai yang.

Gai yang is a barbecued, oven-cooked or rotisserie-cooked chicken, marinated flavorfully and allowed to char slightly. In college, when I spent a semester in Thailand, I lived in an off-campus dorm a few blocks from a market called Talat Ton Payom (or Talat Suthep), where gai yang was sold. A market fiend, I was there almost every day buying treats to eat. Bags of fresh-cut pineapple. Snacks of sticky rice and spicy Northern Thai chili dipping paste. Fresh-squeezed orange juice. Som tam. And, of course, gai yang, always rotating temptingly behind a sheet of glass at a stand by the sidewalk. Gai yang, the food that convinced me I couldn’t be a vegetarian.  Not with something this tasty in the world, at least.

This week, I’m excited to be hosting my friend P’O, who lived on my dorm hall that semester.  She told me ruefully that Talat Ton Payom has changed a lot, that it’s much more polished and indoors now, not the collection of outdoor stands it once was. We’ve been doing a lot of reminiscing, including about a night we spent eating gai yang, sticky rice and pineapple with our friend for our friend’s birthday (there was also alcohol involved, and apparently I speak Thai funny when I’m drunk).

I finally made a whole-chicken gai yang in my rotisserie oven.  I was worried because it looked like the skin was burning, but I mentioned it to a Thai friend and she said, “If it’s not burnt, it’s not gai yang!”  Indeed, a popular chant about gai yang translates roughly as: “Burnt gai yang! Hasn’t been skewered. Skewer it in the left butt-cheek — ooh! Skewer it in the right butt cheek — ooh! Hot, really hot, really hot, really hot!”  (I’m not making this up.)

She was right.  It was super moist inside and the skin tasted just like that chicken at the market.  It helped that I’d bought a fresh chicken from Stokesberry Farm at the farmers market, and marinated it for a day.

Making this in the rotisserie is ideal, but you can also cook it in pieces on a tray, and flip them when they’re nearly burnt. If you don’t have a rotisserie, they tend to be cheap on craigslist, and are a fantastic way to cook whole chickens easily.  My grandmother taught me this. Her famous rotisserie chicken recipe is here.

~

Gai Yang: Thai Rotisserie Chicken

  • 1 whole fresh chicken (small is ideal; this one was about 2.5 lbs)
  • cilantro, chopped fine
  • garlic, chopped fine
  • honey
  • jam (optional)
  • pepper
  • fish sauce
  • soy sauce
  • a little coconut milk (optional)
  • juice of 1 lime, for a sauce (not Thai, but so delicious!)

IN ROTISSERIE:

1. In advance (at least a few hours, but 10-16 hours is ideal), marinate the fresh chicken in a mixture of the rest of the ingredients.  As to quantities, there should be enough fish sauce and soy sauce that the whole chicken has been sprinkled, and some of each area rubbed or drizzled with something sweet, ideally honey and jam — plum or orange is nice — but you don’t want this to be a super sweet chicken.  The rest should all be sprinkled on.  I didn’t use coconut milk, but some recipes include it in the mixture.

2. When it’s time to cook, tie up gai yang and put it in your rotisserie (stabbing through the butt cheeks — ooh!).  Leave foil on the bottom of the rotisserie to catch the drippings.

3. Cook about 45 min to 1 hour, or more if it’s not a very small chicken, until chicken is cooked all the way through and skin is burnt in some spots. Take out and let cool.

4. Meanwhile, collect all the drippings from the foil.  Pour into a bowl and mix with juice of one lime for a sauce that’s really tasty on rice or mashed celery root/potatoes/etc.

5. Cut up gai yang* and serve with nam jeem, sweet chili dipping sauce, available in the Thai section of any store that sells Thai ingredients. It’s also very traditional with Thai sticky rice (kao neeow).

IN AN OVEN:

1. Cut up chicken when raw.  Marinate as above.

2. On a foil-lined baking sheet, bake pieces skin-side-up at 375F until very well browned, nearly a little burnt.  Flip and cook 10 minutes on the other side. Serve.

~

*CUTTING UP A CHICKEN

If you don’t know how to cut up a whole chicken, here’s a good process.  Use a good kitchen scissors, especially one that has an indent for cutting bone.

1. Cut off the wings and legs.

2. Cut all the way up the front/breast.

3. Cut along the sides, separating the breast from the rest of the chicken on each side.  You can cut the breast down into fewer pieces if you like.

4. Cut along the backbone on both sides, separating the thighs.

Your chicken is cut!

Just for fun, and on an entirely different note, I’ve been drawing biostatistics/health sciences/epidemiology humor sketches at 4 a.m. as a way to take a break from academic stress and deal with insomnia.

I’m not saying I can draw, but here they are anyway.

PERIODIC REGRESSION/COX’S PERIODIC REGRESSION

~

SELECTION BIAS / BAR PLOT / X BAR

~

PAIRED ANALYSIS

~

HISTOGRAM

~

RELATIVE FREQUENCY

~

NHANES

~

ECOLOGIC STUDY

~

µ

~

PRIMARY CARE


A few weeks ago, Sea Breeze Farm was selling merguez, a spicy North African lamb sausage, at the farmers market.  Their sausages usually contain pork fat or pork casings —  and I don’t eat pork — but this time, the merguez had no pork mixed in, and they had some for sale that was not cased.  So, I got to try my first Sea Breeze sausage.  Spicy and delicious, with wonderful lamb flavor.

I made a few things out of it, but this quiche was my favorite.  Slow-cooked fennel and onion, and sautéed mushrooms, lamb sausage, and a few fennel or cumin seeds in the crust.  Tasty.

~

Lamb Merguez Sausage Quiche With Fennel, Onion, and Mushrooms

FILLING

  • 1/2 lb merguez sausage (or ground lamb plain — you can even add your own spices)
  • 1 large onion
  • 2 small bulbs or 1 medium bulb fennel
  • 1 cup (roughly) mushrooms — shiitake, wild, button, or anything else that sautés well
  • 5 eggs
  • about 1/3 cup cream
  • some butter, coconut oil or animal fat (lamb fat would be amazing) for cooking the vegetables
  • salt

CRUST

  • 1 cup mixed flours — I used about 1/3 cup coconut flour, 1/3 cup almond flour, 1/3 cup buckwheat flour for a nice, dark crust
  • 3 T butter or coconut oil
  • 1 T fennel seeds or cumin seeds
  • pinch of salt
  • a little water and a little olive oil

~

Preheat the oven to 375F

1. In a food processor, combine all the crust ingredients except the water and olive oil.  With the machine running, drizzle in a little of each, alternating, until a ball of dough forms on its own.

2. Lightly grease a pie dish.  Press your dough into it and keep pressing up the sides until you have a full crust.  Bake at 375 until a little firm, about 10-15 minutes.

3. While it’s baking, start cooking your filling.  Slice onions and fennel (white part and a little of the stem) thinly.  Cook slowly with a little salt until completely clear and soft and starting to brown slightly, nearly caramelized.   (at some point in here, remember to take your bottom crust out of the oven)

4. Add a little more fat and sauté in the mushrooms, until they release their own juices.

5. Crumble in the lamb and cook.  Break pieces up as much as possible.

6. Turn off the heat.  In a separate bowl, beat eggs with cream.  Mix in lamb/vegetable mixture.  Pour all of this into the crust.

7. Bake at 375 until done, about 45 minutes.  Should be golden on top and solid all the way through.


The Cornucopia Institute has just released a 72-page report (pdf) detailing the ins and outs of organic eggs sold in the US. Specifically, the report gets into detail about discrepancies between what consumers may imagine about the egg-laying chickens and what is sometimes a very different reality. They go into detail about some of the larger brands of organic eggs available in supermarkets

The nutritional information isn’t terribly new. The report references the Mother Earth News study demonstrating the superior nutritional value of pasture-raised chicken eggs to supermarket varieties.

That study, and this report, both gave top marks to local producer Skagit River Ranch.

About those marks, on the Cornucopia website you’ll find this great scorecard of producers. It ranks egg producers, including some small farm producers, on a detailed scale. Note that this is by no means comprehensive. I’d also expect top marks from other vendors at the farmers market who raise chickens on pasture and are intentional about feed, or farms like Biocento (which sells its eggs at Madison Market — expensive but delicious). But this is the second time Skagit River Ranch has gotten national attention for the quality of their eggs. Impressive!

~
Thanks to reader Dane for this tip.  Thanks to Plays With Food for the flickr Creative Commons photo.

And thanks everyone for continuing to spread on yesterday’s post about Estrella Family Creamery.

Have you made friends with celery root yet?  Also known as celeriac, this wrinkled bulb at the base of a celery plant  is a delicious, albeit charmingly funny-looking, friend to have in your kitchen during the colder months.

I posted a recipe previously for celery root soup.  Today’s offering, a mashed celery root recipe, is great side dish for soaking up sauces or eating with meats or veggie dishes.  It’s especially good with roasted or rotisserie chicken.  A more-flavorful alternative to mashed potatoes, it also has a lower glycemic load and fewer carbohydrates.  And it’s tasty.

Don’t be daunted by the outside.  Slice it off thinly, and chop the root up until soft.  Then, mash the pieces with whatever you’d like, whether that’s other mash-worthy ingredients like squash, cauliflower or potato, or flavor-enhancers like sautéed onions.  My favorite version is below.

~

Mashed Celery Root with Onions, Mushrooms and Cream

  • 1 celery root
  • 1 onion, chopped
  • handful of mushrooms, any variety that sautés well (shiitakes, button, chanterelles, morels, etc)
  • flat-leaf parsley (optional)
  • butter
  • cream
  • salt
  • pepper (optional)


1. Slice off the thin outer portion of the celery root with a knife.  Chop the root.  Add to boiling water and cook until soft.

2. Chop the onions and cook slowly in butter with a bit of salt until they’re clear through and a little browned.  Add mushrooms (sliced or chopped) and more salt.  When the mushrooms release their liquid, add the parsley and stir until wilted.

3. Mash the celery root with as much cream as it will absorb fully.  Mix in the onion-mushroom mixture.  Adjust salt and pepper to taste.

I wrote a few weeks ago about dealing with my beloved grandmother’s decline in health as she faces pancreatic cancer.  I wrote that the desire to bring her food was inseparable from how I express love, and how she has expressed love for me.

~

Food and love has been on my mind a lot during these emotionally up-and-down months spent hoping, not hoping, living life, being distracted from life.  The emotional fluctuation is reflected in my kitchen. Some days and weeks I have little desire to cook.

~

Some weeks I want to cook everything I can get my hands on, to fill my house with familiar and comforting aromas: my mother’s roast chicken, my grandmother’s mandelbrot, my favorite chicken from Thailand.  The mashed celery root that smells like a few winters ago, the ground lamb dish that smells like last summer.  Salad dressings that taste like mother’s and grandmother’s, coating greens and plenty of tomatoes.

~

Familiar foods of home on the stove tell loving, olfactory lies: Things are not changing, and here is the smell and the taste of the past as proof.

~

The lie is a comfort during times of grief, but cooking foods from the past paradoxically gives us a chance to create new stories for the present and future. Share a dish with a friend, and now the friend has a new memory associated with the taste, as do you.  Memory is fascinating: an original memory, already imperfect in its construction, is replaced with a fresh version each time we think about it.  The story of any dish is similarly changed each time we cook it.  I share food, and remember I’m not the only one here.  I pass on some of the love in a dish I’ve learned to make.  Eating is a shared sensory experience, a way to explain, This is a flavor I’ve tasted.  This is what it has meant to me.  What it means to me is dynamic and changing.  Let’s eat.

~

It’s a way to look forward, and maybe the only way.
~

I’m taking stock of memories, of present circumstances, of wishes for the future.  Of things I want to say to my grandmother.  Of things I won’t be able to share with her that I wish I could.  Of memories we’ve lived together and how not to keep them sequestered as memories, but to keep them alive, a reflection of the dynamic way the brain builds memories afresh each time we recall them.

~

I’ve been sketching out some food postcards from my interactions with my grandmother.

~

My grandfather, calling Frusen Glädjé ice cream Froojie Hadjie.  My grandmother laughing, mostly at how hard it made my four-year-old brother and three-year-old self laugh.

~

Pot roast, when I was finally starting to eat red meat again in my early twenties.  I could have eaten the whole thing.  She was delighted.  Post roast is old-fashioned, she said, but I happen to like it.

~

My mother and grandmother at Passover, debating whose charoses to make.  Don’t tell, but I like my mother’s better.

~

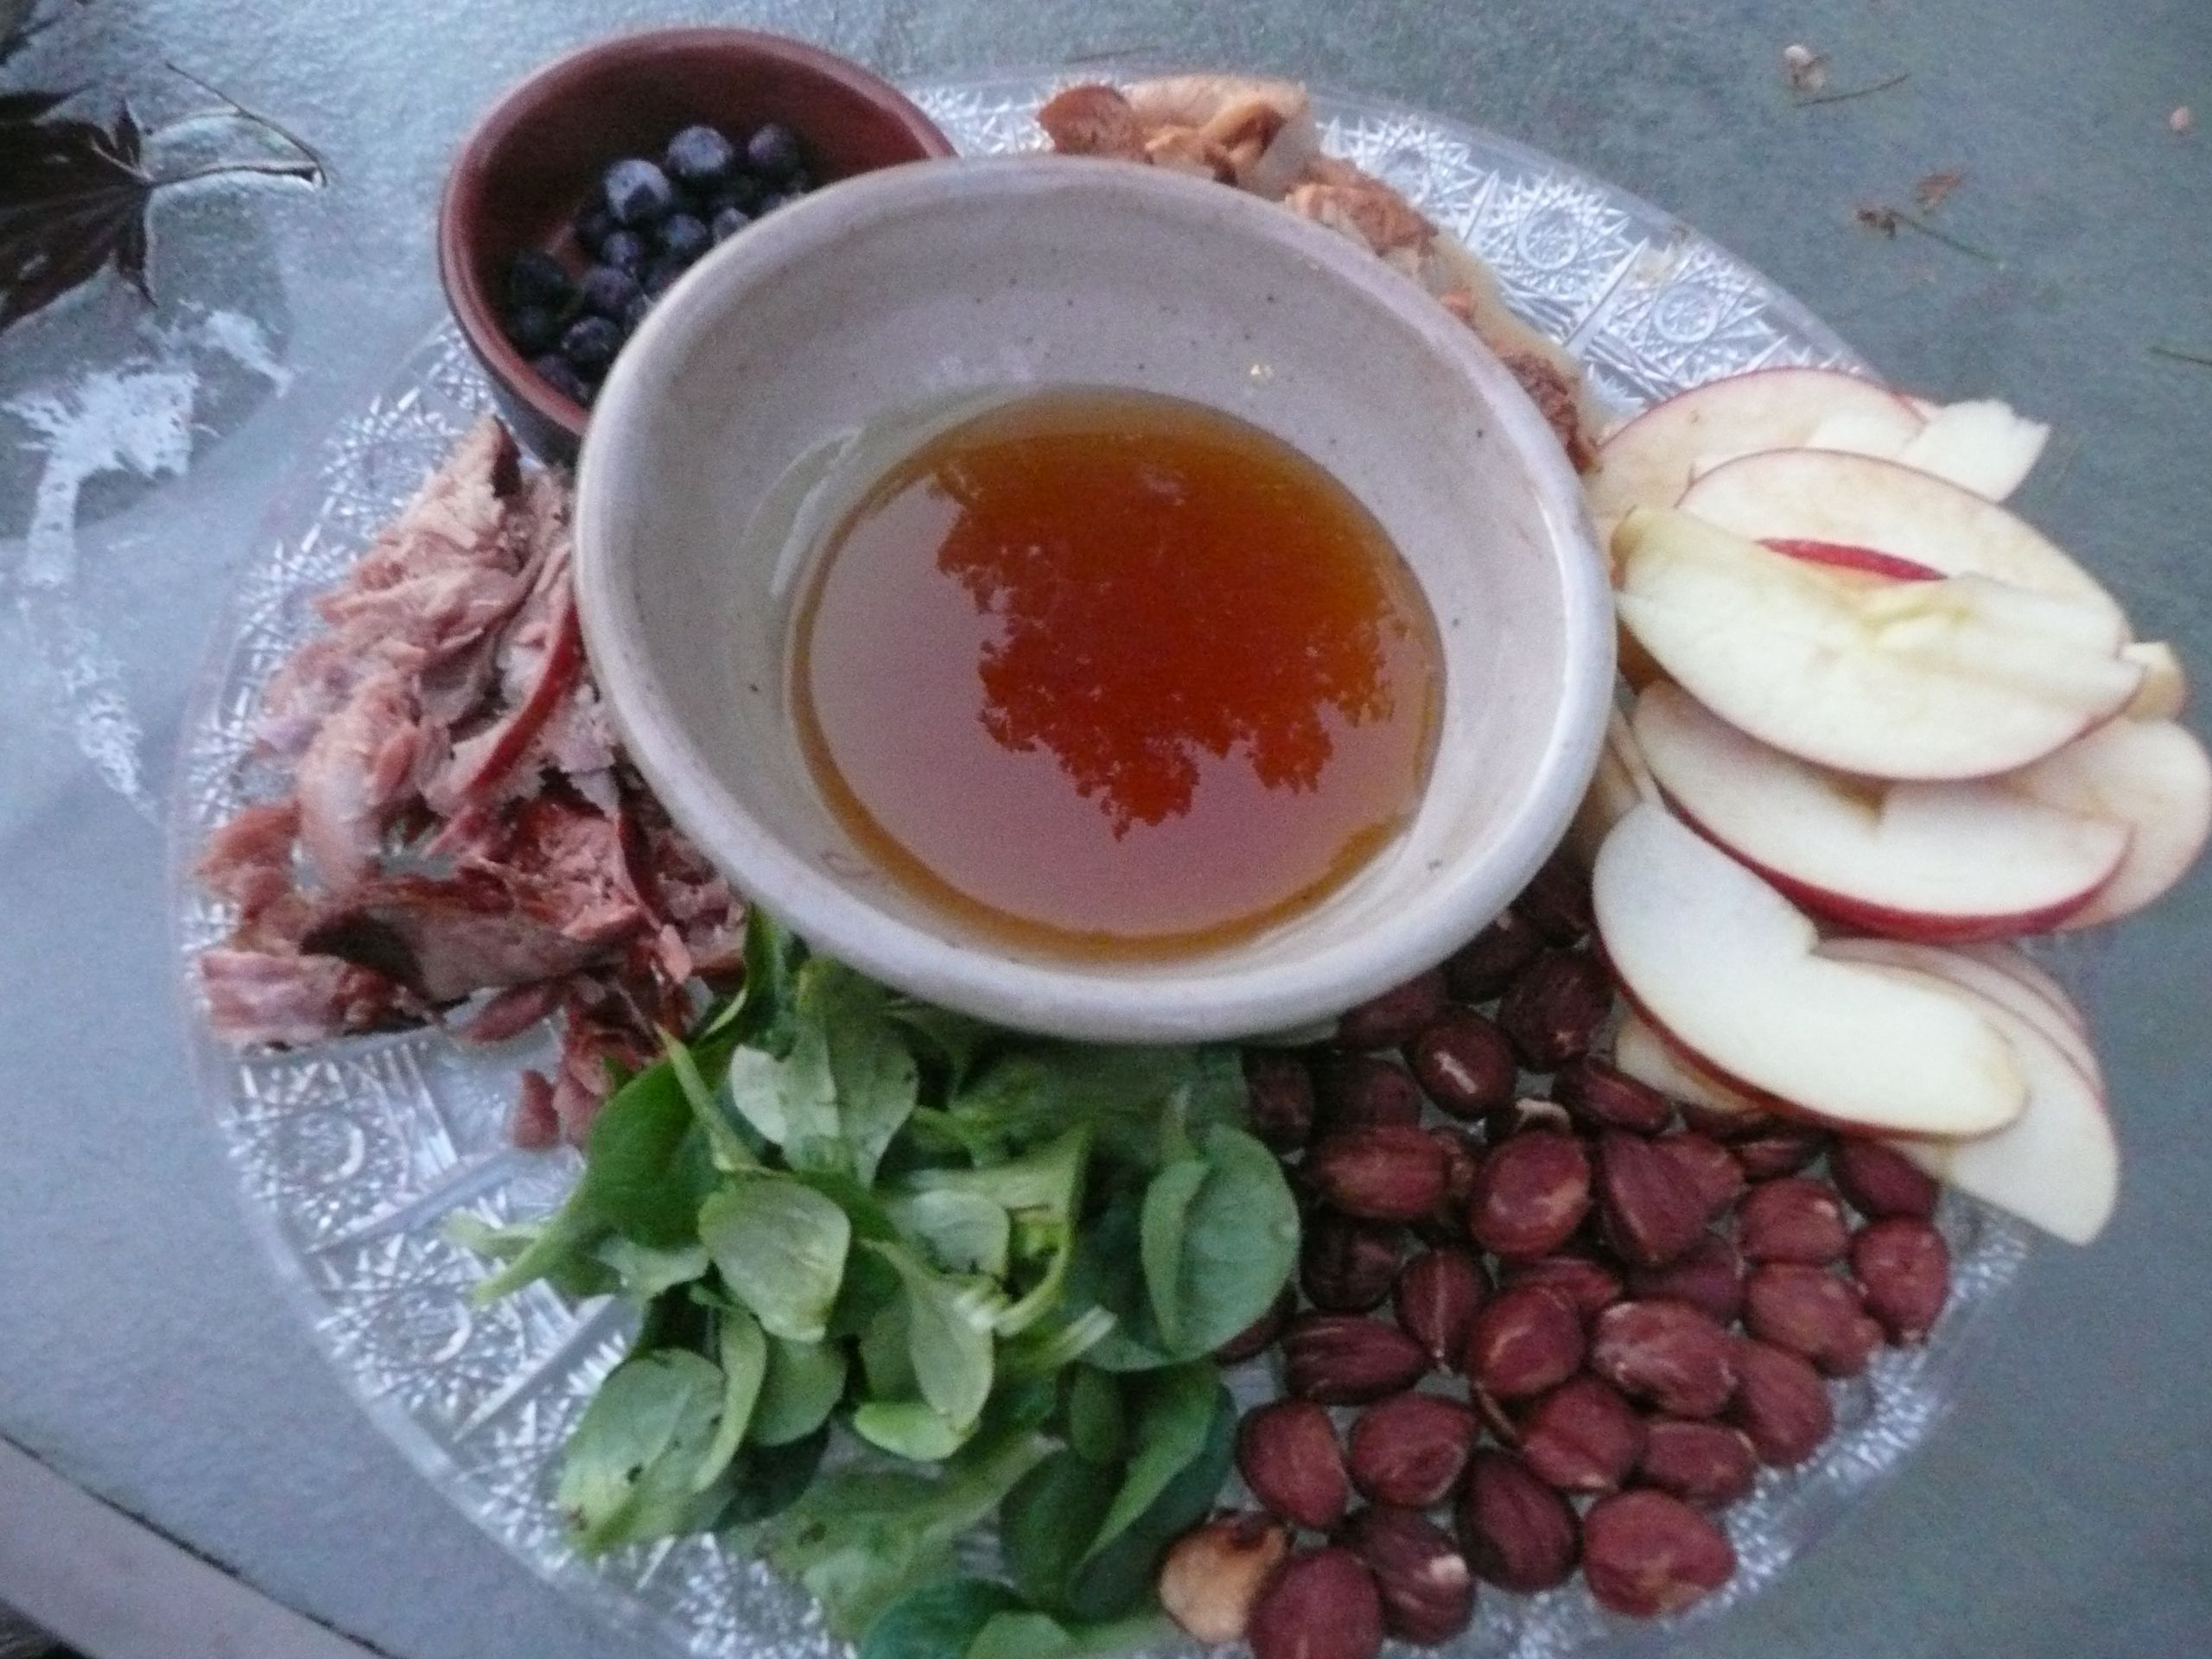
A raspberry bush she kept planted in a pot on her patio back in Long Island.  And a blueberry bush.  Raspberries were my favorite;  blueberries, my brother’s.  She’d save the ripe ones still on the bush for our visits, knowing the thrill of finding a ripe berry.  A thrill I haven’t lost yet.

~

Boxes and boxes of coffee candy.  Purchased presumably from Costco.  My grandmother sent this to me constantly in college.  I enjoyed one or two at first.  Eventually I’d unload hundreds of little gold-and-black wrapped candies on friends, before I got up the guts to tell her I didn’t like coffee candy anymore.  The box in the mail room would make me smile anyway.

~

Boxes of hamantaschen, sent yearly for Purim, with cards or notes on pastel stationary that said Israel at the top.  I was skeptical of the triangular prune pastries at first.  “Hummies,” she said, to make them more appealing.  Savoring and spacing out the last ones in childhood (I still do) nearly to Passover because they were so good, and so rare.

~

Teaching me to make hamantaschen, to roll out the dough.  To paint the x of butter in the middle of each one.  To lean on the dough just so.  Not like this, like this. This and this, for the record, look identical.

~

The first year I made hamantaschen for the family.  In college.  Went to Circle Pines Center in the cold March Michigan woods to be nearly alone for a week, and to bake.  My grandmother was caring for my grandfather, who was beginning a decline into dementia.  It was the first time she couldn’t make her hummies.  I rolled out dough on the cold, stainless steel countertops of the industrial kitchen.  Bought bags of dried prunes and lemons at Meijer’s.  Talked to an occasional other visitor at the co-op, wrapped up in down coats and sipping cups of tea on metal stools in the farmhouse kitchen.  Sent the boxes from the Delton post office.  Cookies, I said, like she always does.  They’ll never understand what you mean if you explain.

~

The year the hamantaschen didn’t come.  My first or second year in Seattle. My grandfather was getting worse.  She hadn’t said anything, so I assumed the hamantaschen were coming, but when they didn’t, I didn’t want her to feel bad.  Later, she called me and tentatively mentioned she was surprised I hadn’t thanked her; had I enjoyed them?  There was a long, horrified pause before we realized the box must have gotten lost in the mail.  I tried not to picture the box rotting away in a cavernous warehouse of lost mail somewhere, or a disgruntled postal officer eating the hamantaschen, far from my house.  Cookies, she might have said.  Cookies.

~

Actual cookies.  My grandmother kept three cookie jars when we were kids, and at least two are still in her apartment.  Lovely ceramic jars she probably bought traveling through artisans’ shops in Vermont.  Each object she bothers to own has a story, a habit I’ve picked up.  The wide jar with the wonderful smooth, brown lid.  Lifted by the little handle, making a clinking sound on the edge.  Releasing the smells of chocolate chip cookies, always with walnuts and golden raisins mixed in.

~

My grandmother at the farmers market, on a mission.  This vendor and then that; he might run out of strawberries, she might run out of broccoli, and I don’t want to miss those nice potatoes.  I may possibly have gotten this tendency from somewhere.

~

Calling my mother on this last visit to California, remembering together who all my grandmother’s vendors are.  Who is the potato guy?  This is her lettuce place, right?  Collecting everything she loves, everything she might want to eat.

~

A basil plant she often keeps on her patio.  The French variety with tiny leaves.  Trimming just a few sprigs at a time, for chicken or pasta.  “Your mother says I shouldn’t keep this, that she likes to use a whole lot of basil at once.  But I find this is just right for me.  Will you get me the scissors?”

~

Freshly squeezed orange juice in the mornings.  My grandfather’s domain, while he was still alive, even when he as declining, just to show he could do it.  Strained for my grandmother.  Not too much, not too acidic.  Oranges bought at the market, of course, from her favorite vendor.  Loaded into the bottom of the cart she keeps in her trunk.

~

Are you hungry? Have you eaten lunch? Are you sure?  She asks this of everyone in her house.  Relatives, a neighbor, her nurse.  Even when I was there last, and she was weak and depressed and needing help getting into a wheelchair, she made sure everyone had eaten and wasn’t going to be cold outside.  Laugh about Twitteleh all we might, some stereotypes hold true.

~

I call her now and she’s too tired to talk much.  Am I happy?  How is school?  Am I working hard?  How is my house?  Have I been eating?  Of course, Grandma.  Everything’s fine.

~

Her plum cake, which I wrote about earlier this fall.  The friends who keep writing or calling to tell me they’ve made it.  She’s glad when I tell her.

~

Coming home from a college semester in Thailand, having burned off all my taste buds on hot peppers and chili pastes.  Flying into Los Angeles, staying with my grandparents.  I couldn’t taste a thing my grandmother served me.  I finally found a bottle of hot sauce in her fridge, presumably something my uncle had left there or she’d bought for guests.  I reassured her it was fine, that this way I could taste her food.  She looked at me with the same bewildered expression I’d given my Thai host sister a few months before, when I’d cooked her pasta with fresh tomato-basil sauce and she’d loaded her plate with hot sauce.  I understood now.

~

What my grandmother proudly calls her “one oriental dish” which is also her one dish she’s ever made that I can’t stand.  She first made it for me in those jet-lagged post-Thailand days thinking it would taste just like what I’d been eating in Asia.  It’s some combination of tuna, Chinese dried chow mein noodles, water chestnuts, and I think cream of mushroom soup.  This dish should have been outlawed after the 1950s.  The hot sauce didn’t help.

~

My grandmother’s rotisserie chicken recipe, which I wrote about in a short story.  One of my fiction classmates, in his critique, said it was unfair that he got hungry when he read my stories.

~

In the story, I wrote about Monty, a curmudgeonly, old neighbor, for whom she bought a Costco rotisserie chicken every week, because that was something he liked.  He never said thank you, she told me.  My parents didn’t understand why she bothered, or why she drove him to the senior center sometimes.  He’s old, she’d say.  He has nobody.  I started; how I can I stop?  The man was a Holocaust survivor, had lost his wife, trusted few people.

When I visited, she asked me to bring him the chicken (it took a few tries; she had to call and yell at him to answer the doorbell).  He found me in the hall, alone, and told me in English and Yiddish what a beautiful thing my grandmother does, how it’s a mitzvah, how he’s all alone.  His eyes said most of it.

~

Chicken sandwiches with lettuce, wrapped in waxed paper, packed for a day at the beach.  Boogie boards, sand, a smiling woman with her umbrella and chair.  More sunscreen.  Lunch is perfect.

~

My grandmother refusing to eat some days.  Tea, jello maybe.  It’s rough.

~

Passover this past year in New York.  So thankful I stayed.  Lox on her matzah in the morning.  Heaven, she said, just right.  Singing songs from musical theatre at the seder table (no, not Andrew Lloyd Webber; somehow we got into Guys and Dolls and A Funny Thing Happened on the Way to the Forum).  My grandmother can never remember lyrics.

~

So many stories.  The grief lies in realizing that at some point the number of stories will be proven finite.  The trick to immortalizing, or continuing to count them, is to keep cooking the food, sharing the food, sharing the stories, experiencing new stories.  The mind creates new memories out of old ones, new stories from old.  The recipes and experiences continue.

The sharing, and the love, goes on.

~

I went to the annual Puget Sound Mycological Society Wild Mushroom Show today.  It’s still going on tomorrow and I highly recommend checking it out.

I knew it would be interesting, but had no idea how impressively well-done it would be.  The main room is full of tables of beautifully laid out specimens organized by genus and labeled by species.  The tags are color-coded by edibility.

There are also mushroom-identifying specialists willing to examine specimens visitors have collected from the woods, kids’ activities, a cooking demonstration (with samples) lectures on topics like mushroom sex, vendors, and explanations of different uses of mushrooms (check out the gorgeously-dyed green sweaters and shawls done with local mushrooms, and the hat made of mushrooms!).

If you go, make sure to listen to the trained identifiers/mycologists from PSMS.  I tagged along listening to Hildegard Hendrickson talk about interesting species from the display table, and how to identify them.  Her crowd grew and grew, everyone engrossed.

I also spent nearly an hour listening at the mushroom identifying table.  An attendee had brought in an entire garbage bag full of carefully-separated specimens. He was showing them to chief identifier Brian Luther, who patiently went through each specimen and identified it, talking about its characteristics and edibility.  Another full-fledged identifier, who also happens to be a seven year old boy, helped label all of them.  I don’t call him an identifier in a tongue-in-cheek way; this kid actually knows thousands of varieties’ Latin names (and how to spell them) and is quite good.  I asked him about his skill once on a field trip and he shrugged and said he’d been learning since he was about three years old.

If you bring samples to a mycologist for identification, always make sure you take the entire sample, including the part in the ground, rather than cutting the stem.  In many cases, a mycologist must look at the entire specimen for an accurate identification.  Also make sure samples are kept separate by variety so they don’t contaminate one another, e.g. in brown paper bags, separate baskets, or separate pieces of aluminum foil.  If possible, remember where you found it: on or under what kind of tree?  In grass?  In woods?  Near woods?  On wood chips?  In your crisper drawer in a bag labeled Whole Foods?  Etc.

And, of course, never EVER eat a wild mushroom you’ve picked whose identity you don’t know 100% or which a mycologist has not identified.  There are many look-alike mushrooms in the Northwest and beyond that can either kill you or make you wish you were dead.  Also, species differ from region to region and continent to continent, so don’t assume your knowledge from another place applies here.  For instance, I learned today that in the Northwest, the parasite that makes a lobster mushroom (which is actually a parasitization of another species) only attacks mushrooms on which the parasite will result in a non-poisonous mushroom (although I think I’ve heard that some are more tasty than others).  However, apparently in some other regions of the country, lobster mushroom parasite can attack poisonous mushrooms, and thus it’s better not to eat any lobster mushrooms in those regions.

So much to learn, and not a topic to take lightly.  But so very, very cool.

Check it out tomorrow.  Link is above.

Mark Bittman’s blog recently caught my eye with a piece about how school lunches in the United States are worse than in many countries, including a number far poorer than we are.  In Brazil, he points out, 30% of food for school lunches has to be bought from local farmers.  Here, we get excited when we get an unfunded state mandate to include local produce in school meals.  And it’s not news to anyone that school cafeterias have very little money to work with, and often nowhere to cook actual food.

Most talk about improving school nutrition focuses on minor changes, like increasing the amount spent per child per meal by a few cents. I wish we could think bigger.  The nutrition of children, mothers, and women who plan to become mothers soon is arguably the single most important aspect of health in which we could invest.  Should we really be arguing about cents?  Shouldn’t we be thinking in terms of dollars, nutrients, and everything kids deserve?

But this isn’t a debate we’re going to win any time soon, and there’s a case to be made for starting small, picking one aspect of school diet and advocating for it to change.

Today’s target: low-fat and skim milk.  The USDA advocates for replacing whole milk with these alternatives.  They shouldn’t.

I’ve written in detail about milk before (Do you know your milk?). Low-fat milk has been associated with adult health risks, as in this study which suggested low-fat dairy is associated with anovulatory infertility (as compared with full-fat dairy). But the issue of milk in school diet deserves specific attention.

The USDA publishes dietary guidelines for school nutrition, which districts around the country follow.  One of their primary suggestions: replace whole milk with skim or 1% milk. (USDA fact sheet – pdf)

Readers of this blog are probably already aware that saturated fat is not the culprit of obesity or other markers of metabolic syndrome, but that cheap vegetable oil and sugars and plentiful carbohydrates are more to blame (post on cooking fats and oils is here, for more information).

What do studies on whole milk versus low-fat/skim milk in childhood say?  Is it true whole milk isn’t associated with increased weight gain, or that it’s somehow protective?  Could reducing milk fat actually be detrimental?  To find out, I dug up some research on milk consumption in childhood and adolescence, and the relationship to obesity, weight gain, and metabolic syndrome.

There was a study or two that seemed, at a glance, to favor reducing milk fat. But it became quickly apparent that these were not studies measuring impact on health, but studies measuring behavior itself.  It’s important to be aware that, in research about obesity interventions in school meals, studies that claim to show positive results for reducing saturated fat often do something sneaky: Instead of showing positive results for markers of health (lowered markers of metabolic syndrome, excessive weight gain, etc), they show positive results for — wait for it — reducing saturated fat intake. Yes, interventions to reduce saturated fat intake in school meals can be successful at reducing saturated fat intake in school meals.

I’m not making this up.

Here’s an example about the NYC schools and milk consumption. The authors concluded that replacing whole milk in schools with low-fat milk reduces milk fat consumption in schools. We might as well have a study proving that limiting the number of bananas served in school greatly reduces the number of yellow fruits on the school menu.

Here’s an example about an obesity intervention program among Native American school children.  In this study, the researchers spent three years (and likely a great deal of money — an entire issue of the American Journal of Clinical Nutrition was devoted to their prospective analysis) reducing saturated fat in school diet, on the theory that it would prevent obesity, and failed to produce any difference between the intervention and control groups.  Their report, with chutzpah, insisted their work had been a success, because they’d reduced saturated fat in the school diet.  Never mind that this reduction had no impact on any of their own markers of student health.

I found no study suggesting measurable health benefits for school children drinking low-fat or skim milk instead of whole milk.

However, there are actually some decent studies on milk consumption in childhood and adolescence, and the association between milk fat consumption and obesity.  I found four.  Each study found no association between increased whole milk consumption and increased obesity or other indicators of metabolic ill health.  Some studies found detrimental associations with reduced-fat milk.  Others found that whole milk intake was inversely associated with obesity or metabolic health risks.

~

1 — Berkey CS, et al. Milk, dairy fat, dietary calcium, and weight gain: a longitudinal study of adolescents. Arch Pediatr Adolesc Med. 2005 Jun;159(6):543-50.

This study examined dairy consumption and weight gain in a large cohort of adolescents and preadolescents ages 9-14. Overall dairy consumption was associated with weight gain but, on closer analysis, this was attributable to consumption of non-fat and low-fat milk, but not whole milk. Dietary fat was not associated with weight gain.  Dietary calcium was.  Low-fat and non-fat milk were.  This finding was contrary to the researchers’ hypothesis but, like good scientists, they reported the results.

2 — Barba G, et al. Inverse association between body mass and frequency of milk consumption in children. Br J Nutr. 2005 Jan;93(1):15-9.

Whole milk consumption was inversely associated with BMI (e.g. whole milk drinkers had lower BMI).  When skim milk was added to the picture, the association no longer held true.  The researchers controlled for a number of relevant factors, including other aspects of diet, birth weight, parental education, and parental overweight.

3 — Pereira MA, et al. Dairy consumption, obesity, and the insulin resistance syndrome in young adults: the CARDIA Study. JAMA. 2002 Apr 24;287(16):2081-9.

Dairy consumption was inversely associated with insulin resistance.   Dairy fat was not predictive of weight gain. The authors note an association between high dairy intake and other frequent foods (fruits, vegetables, saturated fat…), and that the study’s observational nature limits it from establishing causality.  This potential for confounding is a challenge of applying epidemiological methods to nutrition studies, but not one that can’t be overcome.

4 — Huh SY, et al. Prospective association between milk intake and adiposity in preschool-aged children. J Am Diet Assoc. 2010 Apr;110(4):563-70.

Assessed milk intake (whole, low-fat or skim) at age 2, compared with adiposity at age 3.  Whole milk consumption at age 2 is associated with slightly reduced risk of adiposity at age 3, but the association is null when results were restricted to those with a normal BMI.  Milk intake itself was not found to prevent adiposity, but dairy fat was also not found to contribute to it.

~

Something these studies don’t mention is that taking away dairy fat means taking away a source of protective fat-soluble vitamins for kids who may already be getting inadequate nutrition.

Industrially produced milk may not be the best food there is, and milk itself may not be suitable for some kids (e.g. lactose intolerance, etc) but given the dismal state of school nutrition, we can’t afford to yield the more healthful version of industrial milk to an even less nutritious (and potentially detrimental) counterpart, especially when the argument for doing so runs contrary to available data.

If we want the USDA to make this change, we can educate about it, talk to our local school districts, or contact the USDA directly (try Janey.Thornton@usda.gov).  Change probably has to come from the USDA, since school districts receive nutrition guidelines from them.

This change may never happen. Certainly, there are political limitations.  It still seems counterintuitive to some people that dietary saturated fat is not actually a contributor to obesity.  And so making such a change, on such a high level as the USDA, sounds politically risky. Yet, years of recommending reductions in saturated fat have had no positive effect.  Efforts should instead focus on the things that work, like the reduction of sugars/sweetened beverages, packaged foods, simple carbohydrates, and vegetable oil.

Besides, by the USDA’s own data (http://www.ers.usda.gov/data/foodconsumption/FoodAvailspreadsheets.htm) our nation consumes less saturated fat, full-fat dairy, and red meat (and more fruits and vegetables) than we did thirty-five years ago.  The real changes to our diet in this time, per USDA data, have been an increase in vegetable oils and corn sweeteners, both of which spiked in the mid 1980s, at the same time the obesity epidemic began growing significantly.  It’s time to focus on these real culprits, and not on animal fat.

Allowing full-fat milk in school meals is a simple and research-based place to start.

~

Thanks to bookgrl for the Creative Commons photo.

Cod Liver Oil Season is Back

October has started.  It’s the season of red-leafed huckleberry bushes, golden larches [blatant excuse to stick in a hiking picture], rain, wild mushrooms and… cod liver oil.

In honor of October, I’m reworking a post I wrote a few years ago at my old site, on cod liver oil and vitamin D.

Once again, the long, wet and cold season is arriving here in Seattle.  The days are getting shorter and the skies, greyer.  Stand outside too long in the drizzle, or the sun breaks, and you might start to grow moss.  But you might not start to produce vitamin D.

You’ve heard vitamin D called “the sunshine vitamin,” but it’s not actually Seattle’s clouds that constitute the primary culprit in our winter vitamin D deficiency.  True, most of our days are so cloudy that we get very little sunlight, but even when the sun is out, studies suggest we don’t actually get a significant amount of vitamin D from sunlight in winter at this latitude.  In one study, people in Boston (lower latitude than Seattle) couldn’t produce cutaneous vitamin D3 on sunny days between November and February, while people in Edmonton, AB (higher latitude than Seattle) couldn’t produce it between October and March.

To stay healthy, it’s important to get adequate vitamin D3 from a reliable source, one where the vitamin is natural, and appears with other fat-soluble vitamins and omega-3 fatty acid. So, this is a good time of year to start thinking about adding cod liver oil as a supplement to your diet.  Cod liver oil is rich in vitamin A, omega-3 fatty acids and vitamin D3.  Vitamin D doesn’t appear in many foods, so, at least in warmer months, sunlight is our primary source of vitamin D.

I actually just had my vitamin D levels checked and they’re not too bad, but most of us are deficient most of the time.  And actually, latitude isn’t the only problem. Vitamin D deficiency is rampant, even in summer, and even in equatorial countries where residents get a lot of sunlight.  We often hear behavioral reasons for this: we’re outside less in every country, people wear long clothing in many equatorial countries, etc.

But in reality, it’s often factors like diet and obesity that interfere. There are reported relationships between vitamin D deficiency, obesity, latitude, and glucose metabolism. And not only does vitamin D deficiency contribute to obesity, but obesity seems to make it harder to correct vitamin D deficiency in some studies.  The correlation between the two is strong. Add enough cheap vegetable oil, sugars, flour and fast food to a country’s diet and you’ll see obesity levels skyrocket, along with vitamin D deficiency.  Worse, natural fats that disappear from diet (like traditionally-rendered animal fats from animals on pasture) were actually a good dietary source of vitamin D in many of our cultures.  Oops.

In previous eras, vitamin D deficiency was associated almost exclusively with the presence of rickets. However, research in the last decade or so [like this] has moved awareness of this hormone-vitamin to a more prominent place in our understanding of health and nutrition. Vitamin D deficiency may play a preventative role in other diseases attributed largely to environmental conditions. Meanwhile, cod liver oil, or equivalents thereof (e.g. oolichan grease in Northwest native cultures) used to be routinely given to children and adults, particularly sick ones, in winter.  This information has gone culturally by the wayside.

The list goes on. Vitamin D3 is an essential vitamin and also facilitates absorption of other critical nutrients.  It’s associated with bone health, mood, and protection against a number of diseases, including cancer, and autoimmune diseases like  multiple sclerosis as well as diabetes and insulin resistance.  There also seems to be an association between vitamin D intake and lowered cardiovascular disease risk. There is some indication of a link between vitamin D deficiency and asthma, another disease correlated with exposure to environmental pollutants. An overview of gestational vitamin D deficiency noted links to future health effects such as cardiovascular disease, diabetes, obesity, cancer, and permanent disruptions to the central nervous system’s formation, as well as future vitamin D responsiveness in the infant brain. This makes vitamin D sufficiency yet another aspect of health incredibly important for pregnant women or women of child-bearing age who are considering future pregnancy at all. I wrote a little more about the connection between vitamin D deficiency and autism here and here (a series I’ll repost and finish here at the new blog at some point).

The recommended daily dosage of vitamin D has been lower than it ought to be for years.  By some estimates, the recommended daily allowance is only about a tenth the amount we need.  This is slowly changing.  Recently, the American Academy of Pediatricians recommended doubling the childhood dose of vitamin D, after years of seeing deteriorating childhood health and disease susceptibility strongly correlated with poor vitamin D intake.  High intake of vitamin D is also essential for pregnant and breast-feeding mothers, so their children can have adequate vitamin D at early stages of life.

But wait… cod liver oil? Doesn’t that taste terrible?  The terrible taste, and past generations’ memories of it, has not helped its, uh, branding reputation in our culture.  My grandmother remembers hiding under the bed to avoid the dreaded spoon.  It’s also considered old-fashioned; a German friend of mine balked when I asked him if it was still used in Germany.  No, he said, that’s something his grandmother would have done, along with making sauerkraut.  A stereotype!  I broke it to him that I both take cod liver oil and make sauerkraut.  No offense intended.

And actually, it doesn’t taste as bad as it used to.  The kinds on the market are pretty palatable these days, and it doesn’t take long to get used to them, and if you take it daily, you really do.   I may enjoy cod liver oil less than I enjoy grass-fed butter or huckleberries, but I do enjoy knowing I’m taking care of an essential part of my health.  And actually, I don’t mind the taste.  By the way, for those who have experienced the unpleasant side effect of burping up the flavor of cod liver oil, this symptom is reduced for a lot of people by taking the oil right before or with a meal.

To make it go down easier, I usually down some whole milk or cream right after taking it.  This adds fat, which is good since these are fat-soluble vitamins.

I take this brand of cod liver oil, Blue Ice (and no, there’s no official sponsorship; they have no idea who I am or that I recommend their cod liver oil.  I don’t take sponsorships.).  Some brands of cod liver oil are processed in such a way that the naturally-occurring vitamin A and D are removed, and synthetic versions are added back in.  That’s not true of this one.  Also, it claims to be sustainably harvested.

So help your body resist the winter blues this year.  Strengthen your immune system and disease resistance.  Down a half spoonful of cod liver oil every day, and see how you feel this winter.  For even better intake of essential fat soluble vitamins, take it with some grass-fed butter, and you’ll also be getting some Vitamin K2 MK-4.  Plus, you’ll get to eat butter.  Or, you can get their version of cod liver oil that has grass-fed butter oil (concentrated butter) mixed in.

~

Some reading:

Weston A. Price Foundation on cod liver oil (with links to articles)

Rajakumar K, Fernstrom JD, Holick MF, Janosky JE, Greenspan SL. Vitamin D status and response to Vitamin D(3) in obese vs. non-obese African American children. Obesity (Silver Spring). 2008 Jan;16(1):90-5.

Heaney RP. Lessons for nutritional science from vitamin D. Am J Clin Nutr. 1999 May;69(5):825-6.

Alemzadeh R, Kichler J, Babar G, Calhoun M. Hypovitaminosis D in obese children and adolescents: relationship with adiposity, insulin sensitivity, ethnicity, and season. Metabolism. 2008 Feb;57(2):183-91.

Weiss ST, Litonjua AA. Childhood asthma is a fat-soluble vitamin deficiency disease. Clin Exp Allergy. 2008 Mar;38(3): 385-7. Epub 2008 Jan 2.

Levenson CW, Figueirôa SM. Gestational vitamin D deficiency: long-term effects on the brain. Nutr Rev. 2008 Dec;66(12):726-9. Review.

Grey V, et al. Prevalence of low bone mass and deficiencies of vitamins D and K in pediatric patients with cystic fibrosis from 3 Canadian centers. Pediatrics. 2008 Nov;122(5):1014-20.

Kalueff AV, Eremin KO, Tuohimaa P. Mechanisms of neuroprotective action of vitamin D(3). Biochemistry (Mosc). 2004 Jul;69(7):738-41.

Garcion E, Wion-Barbot N, Montero-Menei CN, Berger F, Wion D. New clues about vitamin D functions in the nervous system. Trends Endocrinol Metab. 2002 Apr;13(3):100-5.

~
Please vote for Seattle Local Food by October 12th!~
We're Competing badge


Even in the summer, I like to eat hearty stews, ragoûts, casseroles, and generally filling dishes of meats and vegetables cooked together.  But fall and winter invite these dishes onto our plates, into our freezers, into our bellies.

Now that grad school has started back up and I’m spending more of my time doing things like trying to understand baffling biostatistics software, I’m also enticed to make the kind of dishes I can stick in the fridge and eat for lunch all week.  This dish fit the bill.  It’s easy to assemble, it makes the house smell good, it’s filling, and it’s good for you.

The dish is based around grass-fed ground beef and fresh cauliflower, two cheap and healthy foods that get better cooked slowly with other flavors. You can vary the recipe up.  I made it grain-free, but it would taste good with brown rice.  You can add other vegetables, like broccoli or mushrooms.

~

Cauliflower Ragoût with Beef, Tomato Sauce and Parmesan

  • 1 head cauliflower
  • 1 pound ground beef
  • 1 pint tomato sauce
  • 1 large onion
  • 1 small head garlic, or half a large head
  • greens, especially Italian kale or collards
  • parmesan cheese to taste/cover
  • a pinch of saffron
  • salt and pepper to taste

Preheat the oven to 375F

1. In a casserole dish that can go both in the oven and on the stove, cook chopped onion in fat — I combined olive oil and beef tallow.  Add some salt.

2. When the onion is soft, clear and browned, add garlic and beef.  Add salt and pepper to taste.  Brown the beef.

3. Pour in tomato sauce and crumbled saffron, and stir.  Add cauliflower, chopped up, and stir until it’s covered with sauce.  Stir in any greens.

4. Grate or slice parmesan onto the top.  Drizzle some olive oil over it, and grate on some black pepper.

5. Cover and cook for 45 minutes, or until the cauliflower is melted-soft.

Every year around September, Billy of Billy’s Gardens, who sells at most of our local farmers markets, offers a deal on #2 tomatoes in bulk: a 20-pound box for $25.  I generally get a box to help feed my tomato addiction through the winter.  Other vendors also offer discounts on tomatoes if you buy in bulk, although that may be more challenging with the cold weather we’ve had this year, and its effects on the tomato harvest.

The easiest way to store these tomatoes for cooking is something Billy taught me: Freeze them.  Throw the tomatoes whole into a bag or container, and stick them in the freezer.  When you’re ready to cook with one, pull it out, set it in a bowl of hot water for a few minutes, pull the peel off, and throw it into your pot.

But the last two summers, I’ve turned my bulk tomatoes into a roasted tomato sauce.  The sauce can be frozen to last through the winter.

Roasted tomato sauce develops a sweet, rich flavor.  An added benefit is that the liquid which seeps out of the tomatoes can be poured off to and used as a wonderful soup base.

Here are the general directions for the sauce and the stock:
~

Roasted Tomato Sauce

(and Tomato-Liquid Soup Stock)

yields 10 pints

  • 20 pounds of tomatoes
  • garlic to taste (I think I used 3-4 heads)
  • salt to taste
  • pepper to taste
  • olive oil

1. Preheat oven to 375F

2. Wash tomatoes.  Arrange them in deep baking dishes.  Three large, rectangular Pyrex baking dishes, or two large ones and two small ones, should do it.

3. Peel garlic.  Intersperse the garlic cloves with the tomatoes.

4. Sprinkle salt, pepper and olive oil all over the tomatoes and garlic.

5. Roast for about an hour and a half, or till tomatoes are falling-apart-soft.  If tops are drying out, spoon some of the liquid that is building up over the tomatoes.

6.  Pour the liquid that has accumulated into a jar or jars and save it (fridge or freezer) for soup-making purposes.  It’s rich and tasty, a great broth for soups involving things like eggs, parmesan, vegetables, lamb or beans.

5. Pour remaining tomatoes and garlic into a pot (I had to use two and you probably will too).  Immersion blend them (or process in a food processor).  Taste and adjust salt.  Cook on the stovetop on low for 30-45 more minutes until it has a rich, fully-developed flavor.

6. Freeze the sauce. (I canned the sauce in the past before I realized canning guidelines for tomato products require a certain acidity level and use of a formally tested recipe such as this one or recipes through USDA or university cooperative extension programs.) You can freeze it in jars or in ziplock freezer bags. This is easiest if you cool it first. The fastest way I’ve found to cool it is to pour all the hot sauce into a thin pot that hasn’t been sitting on the stove, and then to set that pot in a sink full of ice water that isn’t deep enough to come over the rim. Once the pot has cooled a fair bit, put it in the fridge on a coaster. The next day, ladle the refrigerated sauce into your preferred freezer containers and freeze.

Fake Farmers Markets??!

Just read an article at Grist about grocery chains (Safeway, Albertson’s) in the Pacific Northwest setting up fake farmers markets full of their own (non-local) produce.  That’s pretty creepy.

Some supermarkets, like the Grocery Outlet on Union and MLK, do host farmers markets in their parking lots, on the theory that it brings them customers, they have the space, and it’s something good to do for the community.

This is not the same thing.

It’s sad that companies, and the marketing staff of companies in particular, can get so caught up in the single-minded goal of selling a product that they’re comfortable misleading customers into buying something we don’t want.  It’s not a way to build long-term trust or keep long-term customers.

Has anyone seen this?

Full article here.

Upcoming Events from City Fruit

Events from City Fruit (forwarded via CAGJ).  Want to know what to do with green tomatoes?  That one caught my eye.  If I don’t make the class, I’m going to be working on some of my own recipes, thanks to Seattle’s charming lack of proper-length summer this year..

~~~~

What to Do with Green Tomatoes?

Saturday, October 2, 2-3 pm

Jackson Place Cohousing: 800 Hiawatha Pl. SE. Seattle, WA

If you’re a northwest gardener, you’ve got ‘em—green tomatoes that didn’t ripen before cool weather set in.  Come learn creative ways to use the last of your tomato harvest, no ripening required!  Turn your green tomatoes into relishes, bake with them, or just cook up some simple recipes for dinner.  And if you can’t cook up all your green tomatoes, learn how to ripen them off-the-vine.  Instructor Kristin Danielson-Wong brings over 20 years of experience in food preserving and teaching, and she just might like green tomatoes better than red. $15 members, $20 non-members.

Register at https://www.brownpapertickets.com/event/130512 or send a check to City Fruit, PO Box 28577  Seattle 98118.

Planting and Caring for Young Fruit Trees

October 9, 10 am-12 pm

Bradner Gardens Park Classroom: 1750 S Bradner Pl, Seattle, WA

Fall is planting time! Plant your tree before the ground gets hard and get a head start on your fruit.  By using good planting, watering, and pruning techniques, and learning to recognize problems, you can give young trees the best chance to become healthy and productive. The class covers site selection, fruit tree selection (how large? What type?), where to buy fruit trees, how to plant them and how to care for young trees.  Jana Dilley works on the Green Seattle Initiative with the City of Seattle Office of Sustainability and Environment.  She has a master’s degree in Forestry and in Public Affairs and has organized community tree-planting events in Seattle and California. $15 members, $20 non-members.

Register at https://www.brownpapertickets.com/event/114585 or send a check to City Fruit, PO Box 28577  Seattle 98118.

Canning Basics: Plum Jam

Sunday, October 10, 2:00-4:30 p.m.

Greenwood Senior Center: 525 N. 85th St. Seattle, WA

Canning is the premier way to preserve fall’s harvest at home, whether from your own yard or the market.  In this class, you’ll learn tips and techniques to can safely and successfully at home, so you can preserve the season to enjoy all year long.  Taste some plum jam made while you watch from City Fruit’s harvest.  Instructor Shannon Bailey is a local canning expert who has taught many workshops on food preservation. $15 members, $20 non-members.

Register at https://www.brownpapertickets.com/event/130544 or send a check to City Fruit, PO Box 28577  Seattle 98118.

Homemade Harvest Pies

Saturday, October 23, 1-3:30 pm

Jackson Place Cohousing: 800 Hiawatha Pl. S. Seattle, WA

It’s time to turn your fruit harvest (or your favorite farmer’s) into homemade pies, for special occasions or an everyday treat. Our instructor Tracey Bernal has worked as a pastry chef and cook at Campagne, Café Septieme, the Palace Kitchen and the Dahlia Bakery.  Tracey will cover methods and recipes for crusts and fillings, including reading recommendations.  She’ll also show you make-ahead methods for fillings and crusts and how to put up fruits for pie fillings.  Don’t miss this rare opportunity to learn from a true culinary professional for an affordable price. $15 members, $20 non-members.

Register at https://www.brownpapertickets.com/event/130802 or send a check to City Fruit, PO Box 28577  Seattle 98118.

We’ve covered a few different ways to preserve or cook salmon, like making gravlax and broiling fresh salmon.

I finally got to experiment with another salmon treatment I’d been wanting to try: Ceviche.

Ceviche is a Central and South American dish, a way to cure raw fish using lime juice, a bit of salt, and other flavors like tomato, onion, cilantro, chilis, and vegetables. It’s a much quicker cure than gravlax; gravlax takes two days, whereas ceviche is cured and ready to eat in three or four hours.

The impetus for this ceviche came from something the guys at Wilson Fish sell at the farmers markets where they vend. They have little bags of salmon bits they call spoonings, the fatty, delicious parts scraped off the backbone after filleting. I use them for coconut milk curries most of the time, but wanted to try something new.

Like salsa, ceviche does not follow an exact recipe.  My recipe was pretty unplanned. Juice of one lime wasn’t enough for the 1/3 pound of salmon bits, so I did two. Salt to taste. Two cloves of garlic chopped fine, half a sweet onion, a large tomato, a handful of cilantro, a lemon cucumber, a few hot chilis. It was what I had in the fridge that sounded like it would go in ceviche. Experiment with other ingredients on your own. Halibut would also taste great (and is a bit more traditional), and so would cod or other white fish.

~

Salmon Ceviche

  • 1/3 salmon (sushi-grade, very fresh, or pre-frozen good quality and thawed)
  • 1 very ripe tomato
  • 2 limes
  • handful of cilantro, chopped
  • 1/2 sweet onion, chopped fine
  • 2 cloves or more garlic, chopped fine
  • 1-2 hot peppers, chopped fine (hold the stem and use a scissors to cut into your bowl, to avoid getting oil on your hands)
  • 1 lemon cucumber
  • salt to taste

1. Chop salmon into bite-sized pieces.

2. Chop all other ingredients fine.  Combine with salt and lime juice.

3. Refrigerate at least 3-4 hours or overnight.
~

We're Competing badge

How To Cook Salmon Perfectly

Salmon: Does food get much better?  Salmon is fatty, full of vitamins and omega-3s, flavorful. It’s local and traditional in the Northwest. It’s fast and easy to cook.

And yet there are so many ways salmon can go wrong. There’s farmed salmon, whose failings have been detailed plenty of other places. There’s old salmon, tragically not eaten while it was fresh. And then there’s overcooked salmon, a chewy, dry reminder of what it could have been. Breaks my fish-fond heart.

I credit my perfectionist-scientist mother with my salmon-cooking skills. We spent summers in Seattle when I was a kid, where my mother, standing at the little Habachi grill (which I think was $5 at Pay ‘n’ Save?), or at the oven set to broil, produced perfect salmon with the same meticulous attention she applies to research. Flaky, flavorful, moist. We ate it with Northwest vegetables, homemade tomato sauce, blackberry pie, leaving permanent Northwest flavor imprints in my memory.  The salmon even converted salmon-haters like my friend Ellie, who had never liked salmon until my mother made it for her the night Ellie and I met, when she was ten.

The secrets lie in selecting the salmon carefully, and serving it very slightly underdone.

.

Selecting Salmon

~ Choose salmon that is very fresh. Ask when it was caught. It should look firm and bright, not dull. It shouldn’t smell funny. Buy from a reliable vendor. I love the fish from Wilson Fish at the Ballard, Wallingford and Madrona farmers markets, and Loki’s stuff is also good. There are great vendors down at Pike Place. I’ve had some luck at Madison Market and at Mutual Fish on Rainier.

~ Choose belly fillets (the one that’s thick on one side and thin on the other) as opposed to tails. Belly has more fat and the thickness gives the fish better consistency. King is the fattiest and best, but is also expensive. Go for as thick and high-fat as you can find/afford.

~ Look for nice, pronounced fat lines

~ Buy wild salmon

~ Fresh is better than frozen. Fresh has better consistency. Frozen is okay if you can’t get fresh.

~ Alaska, BC and Washington have more sustainable salmon fisheries than other locations

.

How to Cook Salmon (but NOT overcook salmon)

Salmon on a grill is still the best. If you’re doing that, follow the directions below for doneness and seasonings. Cook it face-down first, so the fat from the skin soaks into the meat. Then, flip and let it cook until it’s done, while letting the skin get a bit grilled for added deliciousness. Get one of those cage-like fish-flipping devices; it’s a good investment to make this process easier.

This recipe is for salmon in your oven set to broil.  It’s easy and comes out great.

  • 1 fillet of salmon, preferably belly.
  • olive oil
  • optional toppings (not too much): lemon juice, olive oil, black pepper, smoked paprika, fresh tarragon, fresh garlic sliced thinly

1. Set broiler to high and position rack right under the flame at the top of the oven.

2. Line a baking dish or oven-proof skillet with aluminum foil.  (You can skip the foil if you don’t mind serious scrubbing).  Place salmon on the foil.  It’s okay if the thinner side is a little folded, so it doesn’t dry out.  This helps you get away with using a slightly-too-small pan, too.

(ADDED NOTE: You can place the salmon one of two ways: 1. You can use my original recipe here, which cooks the salmon cut side up the whole way. 2. Alternatively, you can start with the skin side up to crisp the skin for maybe two minutes and then flip the fish after two minutes. I recommend starting with the simple way and then experimenting with the other one if you like the original recipe.)

3. Drizzle with olive oil.  Add on bits of other toppings if you like.  You don’t need much, because salmon is so flavorful on its own, but a bit of smoked paprika can be nice, as are any of the flavors listed above.  If using herbs like tarragon, press them down into the oil coating the fish.

4. Set under the broiler.  Check frequently.  Estimates vary between 7-10 minutes per inch of thickness, but I prefer to watch it.

Here’s how to tell it’s done:

~ The top is slightly brown and/or tiny bits sticking up get a little charred

~ A little whiteness appears at the sides from the fat

~ When a wooden spoon pressed on top gives back a little resistance but not too much

~ And the MOST IMPORTANT: cut into the thickest part.  At the bottom, you should have some translucent, raw-looking fish. BUT!  This fish is easily parted with a butter knife.  If there’s raw-looking salmon that can’t be teased apart with a butter knife, it needs another moment. If it can, DO NOT cook the salmon any longer!  The fish is moistest and most delicious when you leave this translucent area as so.

Photo evidence: This salmon is perfectly done!  That translucency is your friend!

Serve salmon simply with a side of steamed vegetables and butter, or with some vehicle for homemade tomato sauce, or whatever you like with salmon. Remember also that the skin is delicious and full of nutrients.  If it’s too chewy for you, fry or broil it on its own a bit until crispier.

We're Competing badge

I grew up in New York.  My soul food is: bagels with scallion cream cheese, whitefish, and nova salmon.  Pastrami on rye with mustard.  Deli-style tuna salad, nearly puréed.  Half sour pickles.  Heavily-seeded rye bread.

Most of this, I can’t get on a daily basis.  For starters, there is no decent whitefish in Seattle.  I’m gluten intolerant and try to eat high-fat/low-carb when I’m eating optimally, so not so much on the bread (except for treats or NYC visits).  I do make my own pickles, and the I Heart NY Deli on Roosevelt has pretty great pastrami.  But there are foods I miss.

Surprisingly, tuna salad is one of those foods.  That New York deli style tuna salad is different somehow.  I’ve spent years trying to replicate the tuna salad at a little schmancy foods store in Manhattan called Todaro Bros.  It’s puréed with [lots of lemon juice] [Edited 2014: Apparently no lemon juice, according to the store, but I like it anyway], good quality mayonnaise, and finely grated carrots and celery. I still go out of my way when I visit New York to get to Todaro’s and eat some.

But the holy grail tuna salad in New York is something called smoked tuna salad. Tangy, smokey, a little orange, and utterly addictive. Not easy to find; I found the perfect one once in some obscure little deli in midtown and never found anything as good since, although plenty of delis carry a version. It’s been probably seventeen years since that perfect smoked tuna salad, and I still can’t get the taste out of my head.

I’ve tried to replicate it, like the Todaro tuna.  I’ve used actual good quality wood-smoked tuna from the St Jude tuna guys at the farmers market here (they also have great canned tuna).  I’ve used regular tuna with smoked paprika.  I’ve failed.  A special-association taste is hard to fake.  Your tongue knows when you’ve gotten it wrong.

Today, I got it right… by accident.

I was making lunch for a bunch of people building a sukkah.  I thought I’d purée the tuna salad quickly in the food processor, with homemade mayonnaise and grated carrots, going for my best shot at that Todaro tuna.  Then I realized I’d put in too much mayo for the tuna, and didn’t have another can.  While a friend ran to grab me another from her house, I impulsively threw in some leftover Loki chunk smoked salmon from the freezer.

The secret revealed.

Okay.  It’s possible this isn’t what delis do to make smoked tuna salad.  But I think it is.  Reason 1: it’s the same color, a little more orange than tuna salad.  Actual smoked tuna isn’t that color.  Reason 2: Smoked salmon is much easier to find in New York than smoked tuna.  Reason 3: It tastes exactly right.

If you’ve never had New York deli style smoked tuna salad, or if you crave it from 3,000 miles away, try out this recipe and tell me what you think.  You can get nearly all the ingredients from local producers (aside from lemons): canned tuna, smoked salmon, carrots, optional celery.  It would make an amazing tuna melt, or just a good lunch with some vegetables, tomatoes, cheese and lettuce.

~

Smoked Tuna Salad, New York Deli Style

Proportions are variable according to your taste.  Final product should be fairly smooth, puréed with texture and not liquidy.

  • 1/2 cup to 1 cup smoked salmon (not lox — West Coast chunk style)
  • 1-2 cans of tuna
  • 3-5 tablespoons of homemade mayonnaise (link is for my older bowl recipe… I’ll give you the food processor recipe below)
  • juice of 1 lemon
  • 1-2 carrots
  • 1 stalk of celery (optional)
  • pinch of salt
  • herbs or spices to your taste.  However, they’re not really necessary with this version.

1. Make mayonnaise and set aside

2. Grate carrots and celery finely.  The easiest thing is to attach a grating top blade to a food processor and grate them right into the food processor body, in which you’ll make the tuna.

3. Add to carrots and celery: tuna, salmon, mayonnaise, lemon juice and salt.  Start with the lesser end of the mayonnaise, and you can always add more.

4. Pulse food processor as it combines ingredients.  Add more mayonnaise as needed.  Keep pulsing until puréed with a textured consistency and not liquidy.

Homemade mayonnaise

The linked directions above work great for a bowl.  This is the food processor version.  Note that it contains a whole egg, whereas bowl mayonnaise contains just a yolk.

  • 1 egg
  • juice of 1/2 lemon or 1-2 tablespoons apple cider vinegar
  • pinch of salt
  • 1 tablespoon of mustard
  • 1 cup of olive oil
  • saffron, basil, garlic, or other flavors as desired

1. In bowl of food processor crack egg, add lemon juice or vinegar, salt, mustard, and any flavors.  Pulse a few times.

2. Add top to food processor but leave open the space where you can pour things in while the food processor is running.

3. Measure out your cup of olive oil.  With the food processor running, SLOWLY pour the olive oil in, in a very thin, steady stream.  If you pour too much, take a break and let it emulsify.  Keep going until you’re out of oil.  You have mayonnaise.

We're Competing badge

Local Events & Great Resources

Okay, I’ve been storing up so many events and resources to post about, I’d better get them all down in a post.  I’m sure I’m missing a few I meant to include, so I’ll post again if and when I find them.

~~~~~~~~~~~~~~~~~~~~~~~~~~~~~~~~~~

The Eat Local Now! collaborative is putting on the annual Eat Local Now celebration dinner!  This is a great event and supports a group strengthening and promoting sustainable food systems in Cascadia. You can buy tickets here.

7th Annual Eat Local Now! Dinner
September 30th, 2010
Herban Feast’s Sodo Park  ~ 3200 1st Ave South; Seattle, Washington 98134

This vibrant and successful fundraising dinner celebrates involvement in and cultivation of our local food economy. We advocate for access to locally grown foods for all income and social groups and seek to strengthen the local food economy by supporting local food businesses.

The Eat Local Now! Dinner offers a vital community space for individuals to share their stories, time for food and garden inspired activities, and a delicious community dinner featuring fresh food grown or produced in Washington, prepared by inspired local chefs.

~~~~~~~~~~~~~~~~~~~~~~~~~~~~~~~~~~

Sustainable Food Jobs Resource Website
Looking for jobs (or looking to advertise jobs) around the country having to do with food and sustainability?  Just heard about this website that lists them:  http://sustainablefoodjobs.wordpress.com/

~~~~~~~~~~~~~~~~~~~~~~~~~~~~~~~~~~

Free UW Food Lecture Series!  Eating Your Environment
The University of Washington is offering a remarkable series of lectures about food this quarter.  Open to the public, UW students can also take these for UW credit.
Tuesday nights at 6:30, Kane Hall, starting October 5th.  Don’t miss this.

http://depts.washington.edu/poeweb/news/foodseries.html


~~~~~~~~~~~~~~~~~~~~~~~~~~~~~~~~~~

I caved and created a Twitter feed.  It’s http://twitter.com/sealocalfood  .  I kind of hate Twitter, but I know some people like it.  Do people just find my feed on their own?  I don’t really understand this crazy interwebs business, apparently.
~~~~~~~~~~~~~~~~~~~~~~~~~~~~~~~~~~

SLICE 2010

October 23rd

Seattle Central Community College

SLICE ( Strengthening Local Independent Cooperatives Everywhere) is our region’s 2nd annual cooperative business conference. If you’re currently part of a co-op business, are starting one, or just want to learn more about how the co-op business model can help build an economy that is more just and economically sustainable, this conference is for you! Co-presented by Central Co-op and Seattle Good Business Network, the conference will feature national and regional speakers, workshops, and great food! Details and tickets at slice.coop.

~~~~~~~~~~~~~~~~~~~~~~~~~~~~~~~~~~

Urban Agriculture Victory at Atlantic City Nursery

Great news from Urban Farm Hub about the City of Seattle’s Atlantic City Nursery site. It seems the Parks Board Commissioners have agreed that future use of the site should include urban agriculture. It’s been a good year for Seattle’s process of becoming more urban-farm-friendly!

~~~~~~~~~~~~~~~~~~~~~~~~~~~~~~~~~~


1st Annual Pike Place Market Artisan Food Festival

For more information:  www.pikeplacemarketfoundation.org & www.artisanfoodfestival.org

On September 25th and 26th, the Pike Place Market Foundation will host the first annual Pike Place Market Artisan Food Festival. Hours will be 10:00 AM to 6:00 PM Saturday and 10:00 – 5:00 Sunday.

The 2010 Artisan Food Festival will be modeled after Salone Del Gusto, the popular festival in Torino, Italy and feature outdoor ‘pavilions’ with the following themes: beer, wine, bread & cheese, coffee & tea, meat,  chocolate, vegetables, sustainability, and crafts.  It will also feature chef demonstrations, live music, children’s activities, and beer and wine gardens – something for all interests and ages.

The Festival is produced by the Market Foundation.  Proceeds will benefit the low-income clients who rely on the Market’s four human service agencies – the Clinic, Preschool, Senior Center, and Food Bank.

~~~~~~~~~~~~~~~~~~~~~~~~~~~~~~~~~~


Hazon Food Conference 2010

I attended the Hazon Food Conference last year.  Hazon is an organization dedicated to making a healthier and more sustainable Jewish community and world overall.  They focus largely on sustainable food.  Their conference this year looks interesting and worthwhile; check it out, if the intersection of Jewish culture and sustainability is something important to you.

December 23-26, 2010

Walker Creek Ranch
Sonoma County, CA

[From their website] The Hazon Food Conference is a unique gathering that will bring together 200 professionals, lay leaders, and foodies to connect, collaborate, and continue to build the New Jewish Food Movement.  The Conference will provide in-depth sessions that willstrengthen and expand participants’ knowledge of Jewish thought on food, agriculture, and consumption, as well as opportunities to build community with regional cohorts and professionals of similar backgrounds.

Programming will include

  • Exploring the rich tradition of Jewish thought on food, agriculture, and consumption
  • Examining the Jewish community’s role to create a socially and economically-just and environmentally-sound food system
  • Networking and regional gatherings for farmers, educators, activists, chefs, entrepreneurs, and other groups of people to collaborate and establish action plans
  • Celebrating a joyous Shabbat

More information is available here.

~~~~~~~~~~~~~~~~~~~~~~~~~~~~~~~~~~


We're Competing badge

Updated to add: Thanks to Laura for the screen shot!

So, I had no idea that Google ads appear at the bottom of my blog.  I’m fairly new to WordPress, and I use Adblock on my web browsers.  I guess it’s how WordPress makes money.

Reader Laura cracked up when she got to the end of my last post (about high fructose corn syrup changing its name) and found one of the Google ads was from the Sweet Surprise people themselves!  Oy.

I don’t think they’re going to get any business off this blog, somehow.  I can’t decide if this is creepy or hilarious.  Probably both.

If any of you saw this too let me know!

We're Competing badge

Sometimes, I’d rather not be right.

Years ago, I wrote a blog entry about how manipulatively renaming detrimental ingredients can trick consumers into eating things they don’t want.  I was thinking about the term “organic evaporated cane juice” and how it’s simply a way to encourage people to eat sugar who might otherwise hesitate.

I suggested that, while we’re at it, why not rename high fructose corn syrup something like fructose-infused zea mays nectar?  Make softly lit ads with kittens and puppies getting along?

A few months later, the Corn Refiners Association began their infamous Sweet Surprise campaign, and I thought my prediction had come true.  No kittens and puppies, but pictures of (healthy, happy, multiracial) children getting along while eating popsicles.

Now, they’ve taken my original advice. The CRA has petitioned the FDA to get “corn sugar” approved as the new term. (Was fructose-infused zea mays nectar to long? Sorry about that!).

No sugar is good for you, although I choose to have a little now and then for the sake of occasional baked goods.  But HFCS is extra bad.  It plays a role in obesity, sure, but it seems specifically to induce symptoms of metabolic syndrom (fatty liver, insulin resistance, hypertension, heart disease…) even without obesity.

This is pretty insidious.  The only reason to make the change is that people are making specific, conscious choices not to eat the stuff.  A name change will trick people into eating what they don’t want.

That kind of manipulation is responsible for a whole lot of unhealthy eating in this country. I was listening to a call-in show on NPR not too long ago, hearing some guy rant about how insurance shouldn’t cover anything to do with metabolic disease and obesity because people “make bad choices.”  That kind of attitude is maddening in a world where these sorts of marketing manipulations happen all the time.

The name change is creepy.  But on the other hand, maybe people are catching on to the constant swapping of names and hiding of ingredients.  Since all sugar has detrimental metabolic effects, wouldn’t it be nice if any kind of sugar on the label made people hesitate as long as “high fructose corn syrup” tends to?  But then, manufacturers would probably just switch the name to something else.

I’m glad the label isn’t going to change on the tomatoes, beef, plums, beans, etc I buy at the market.  It’s harder to pull the wool over your eyes when you cook from simple ingredients.  But marketing is very difficult to resist, as are time-saving foods.  I may not like packaged foods, but people do choose to eat them (or feel it’s their only choice).  And as long as people eat them, it’s important to advocate for accurate, non-manipulative labeling and marketing.

We're Competing badge

Fruit Fly Trap!

They’re back, and they want my tomatoes.

I don’t give my tomatoes up easily, so these fruit flies have crossed a line.  Time for another fruit fly trap.

Many fruit-loving households have considered what to do with fruit flies.  A former roommate and I joked about packaging them up for a friend of hers running drosophila experiments in the lab.

But this trap is actually the best solution I know.  I learned it from someone else, who learned it from someone else, and I’ve modified it over the years.

It’s very simple:

~

Easy Fruit Fly Trap

Materials:

  • 1 yogurt container, preferably quart-size
  • A small piece of waxed paper or plastic wrap
  • A knife or scissors for cutting the top
  • A fork or sharp knife or pen for poking little holes
  • Some rotting fruit
  • A little honey

1. Take a plastic yogurt container, quart-size preferably.

2. Cut a circle out of most of the lid, so the lid still fits around the edges of the container but the top part of the lid is gone.

3. Fill the container with old, molding, fruit that’s been cut up or mashed a bit.  (Note: While you do the next steps, some fruit flies will save you trouble by flying into the container to investigate the fruit, and waiting in there.)

4. Get a piece of waxed paper (you can use plastic wrap too but I like waxed best because it’s stiffer, smooth, and biodegradable).

5. In a small area of the waxed paper, about the size of the opening of the yogurt container, punch small holes, with the ends of a fork, a pen, or a fine-pointed knife.  They should be, you know, fruit-fly sized holes.

6. On the underside of the waxed paper, drizzle a bit of honey.  You don’t need much.

7. Place the waxed paper with holes, honey side down, gently over the yogurt container.  Use the cut lid-band to secure it in place.  Place it wherever fruit flies are trying to hang out.  Under a hanging basket of fruit, for instance.  The fruit flies will go in, forcing their way through the holes toward those enticing smells, but won’t usually come back out again.  It’s too hard to find their way out, too hard to get through holes pressed inward, and there’s not much motivation when the inside smells so deliciously like rotting fruit.

8. Every night or so, put the container in the freezer for a while to kill the fruit flies.  Then, take it out and let the fruit thaw to do its work all over again.

Works beautifully.

Enjoy your tomatoes!  And don’t forget to vote in the Best of Western Washington food blog contest.  Voting stays open until October 12th.

You can use this button:

We're Competing badge

I’ve written before about eggs:

~ Why eggs are good for you,

How to pick out eggs,

~ Why eggs contain the important vitamin K2 MK-4 when they’re from chickens raised on pasture, and

~ How small-farm eggs are more nutritious overall.

So, you know there are lots of reasons to eat eggs, other than that they’re cheap and delicious.  And that anyone trying to tell you eggs are bad for you is misguided.

Today, we’re highlighting instead the versatility of the humble and delicious fried egg.  Sure, fried eggs are great for breakfast and brunch.  On top of some smoked-paprika home fries with vegetables (hmm, maybe I should give you that recipe) and with a side of greens or breakfast sausage, they’re one of my favorite things to eat.

But you’ve probably noticed I stick fried or poached eggs on top of a lot of my dishes.  The spring vegetable gratin.  The Thai basil chicken.  The rice bowl with ikura (salmon eggs) and vegetables.

It’s gotten me thinking: What wouldn’t be better with a fried egg or two on top?  Probably most desserts.  Fruit would be pretty weird.  Um…  I’m having trouble thinking of other examples.

Meats?  Delicious.  Rice dishes?  Absorb the egg yolk — yum!  Slow-cooked or lightly cooked vegetables?  Yes. French fries, of course: cooked in beef fat and dipped in the broken yolk of an egg.  A salad?  Actually, yes. Pizza? Egg is a classic addition in Italy, as it is on meaty pasta dishes. Thai food? Very traditional to add a fried egg on top; my college cafeteria in Chiang Mai had a tray of them ready to toss on for 5 baht more.  What about soup?  Poach it right into the soup and break the yolk as you eat to thicken the broth.

In some of these cases, the egg might feel like overkill, but in many it’s a great addition.  And you get some more good fat and vitamins in your meal, along with that extra quick-to-make deliciousness.

I took the classic caprese salad (tomato, mozzarella, basil) and added some fresh eggs from our house’s new chickens (check out those nice orange yolks!).  So tasty.  You can even make your own mozzarella if you’re feeling so compelled (instructions here).

Okay. I want your ideas. What else unexpected is made better with an egg on top? What else would be spectacularly weird?

~

Caprese Salad with Fried Eggs

per person:

  • 1-2 eggs
  • butter
  • 2-3 fresh summer tomatoes (or more)
  • mozzarella, fresh — as much as you’d like
  • basil
  • olive oil
  • salt
  • pepper
  • vinegar (balsamic, blueberry, raspberry, fig, apple cider, whatever)

1. Cut tomatoes in slices or wedges

2. Slice mozzarella.

3. Drizzle with olive oil and vinegar. Sprinkle on salt.

4. Fry eggs in butter, letting yolks stay runny if you like to. A tip: sprinkle a spoonful or two of water into the pan when the eggs are halfway cooked and cover immediately. Helps the whites cook fully and not burn. Take off the heat fairly soon after.

5. Add eggs to salad. Tear basil leaves on top and grate pepper over the whole thing. Serve immediately.

Zucchini Crust Pizza!

When I wrote about cauliflower crust pizza, reader Sarah tipped me off on the Seattle Local Food Facebook page to another idea: zucchini crust. Apparently it’s a trick she learned from her grandmother.

Grandmother-approved and grain-free? I had to check it out. If it was as delicious as it sounded, it could be the ultimate cure for too-much-zucchini season.

It works just like the cauliflower crust, only you pre-shred the zucchini raw, and drain out its excess liquid, whereas you mash the cauliflower after cooking it. If you have a food processor with a top shredding blade, assembling this crust is fast and easy. The whole pizza-making process is actually pretty quick.

The result is a thinner crust than the cauliflower, with a nice chewiness. A wetter topping such as tomato sauce can make it a bit soggy, but tastes so good that I don’t mind. Pesto works really well too. I used some of the nettle pesto from my freezer on one pizza. Delicious.

The pizza above has tomato sauce, fresh mozzarella, extra parmesan, fresh yellow tomatoes added at the end, and a sauté of garlic, onion, Italian parsley, and king oyster mushrooms. Any mushrooms will do.

About the crust proportions: You can really vary them, as long as there is enough egg to bind the other ingredients together, enough cheese to brown, and enough zucchini (with water squeezed out) to give it character. More cheese will make a crispier, browner crust.

Okay, too-much-zucchini season: Bring it on. My toppings are ready.

~

Zucchini Crust Pizza!

This recipe can be doubled.

For the crust:

  • 1 large egg or 2 small ones
  • About 3 small-medium zucchinis (mine were about 8″)
  • 1.5 cups grated parmesan or mozzarella. I liked parmesan best for this one.
  • salt

See note above about how you can vary these proportions according to your taste, your desired crispiness, etc.

For the toppings:

Use anything you like on a pizza. General formula:

  • Mild tomato sauce OR pesto
  • Grated firm mozzarella cheese OR sliced fresh mozzarella cheese
  • Ricotta cheese or goat cheese, for small dollops on top (optional
  • Assorted vegetables. Pre-sauté for extra flavor, especially if you’re using onion, garlic and mushrooms. A little italian parsley or basil is nice too; the basil can be added fresh after the pizza is cooked, and the parsley is nice in the sauté. Finely chopped greens are nice. Fresh tomatoes can be added after the pizza is cooked too.
  • Meat if you like/eat meat on pizza: Crumbled sausage would work well. Pre-sauté. Ground lamb or chicken would be tasty, cooked with lots of garlic.
  • Olive oil, black pepper

Directions:

1. Preheat the oven to 450 degrees.

2. Grate the zucchini.

3. Sprinkle salt on the zucchini and stir. Let it sit a few minutes.

4. Squeeze the water out. I found the easiest way to do this was to wrap it in cheese cloth or butter muslin and squeeze. You can also put the zucchini on one plate and press another plate on top of it, or put it in a colander and press a bowl into it.

5. Mix with egg and grated cheese.

6. Spread parchment paper on a pizza stone or baking sheet. Spread out your dough batter about 1/2 inch thick into a circle.

7. Put it in the oven and cook until it has browned, about 15-20 minutes. Meanwhile, as it is cooking, sauté any toppings you want cooked. I sautéed garlic, onions, mushrooms and Italian parsley.

9. Take the browned bottom crust out of the oven and admire it.

10. Cover it with your toppings.

10. Bake again until crust edges brown further and cheese on top melts into toppings. Take out of oven and add drizzled olive oil, grated black pepper, and optional fresh tomatoes and fresh basil. Serve hot.

We're Competing badge

Rosh Hashanah and the holidays that follow mark the season of sweet foods.

I don’t have much of a sweet tooth, and try to avoid sugar, but there is, as they say, a time and place for everything.  This is the season for my grandmother’s plum cake.

The first rule of this plum cake: Use more plums than you think is reasonable.  The top should be covered entirely in plums that have been cut in half.  And yes, you can use pluots or apriums or whatever color or flavor of plum you like.  Just make sure they’re delicious.

Edited to add: I just spoke to my grandmother and she says apricots are also marvelous in this recipe.  You can even halve them, freeze them, and make this cake in winter.

The original recipe calls for regular flour.  I’ve made it gluten-free with a blend of rice flour and nut flour.  It works great with either almond flour or hazelnut flour.  The last two nights, I’ve used local hazelnut flour, probably my favorite baking ingredient (after butter).

Make this to celebrate fall, to break fast on Yom Kippur, to eat on Sukkot, to sweeten Shabbat Shuva (tonight) or just to use up all those plums that have been attacking you from your plum tree (or the one down the block/in the park/in your friend’s yard).

And when you eat it, wish sweet things, and strength and health this year, for my grandmother in return.

Grandma’s Holiday Plum Cake

  • 1 cup sugar (I’ve used white or brown.  You can also reduce the sugar but it’s necessary to have some for the cake’s crumb)
  • 1/2 cup butter (one stick)
  • a dash of vanilla (optional — you can also try almond)
  • zest of one lemon or orange
  • 1 cup flours: I combine rice and hazelnut (or almond) in a proportion of either 1/2 cup of each or 3/4 cup rice to 1/4 cup nut.  Fluff or sift.
  • 1 teaspoon baking powder (you can sift into flour)
  • pinch of salt, unless you’ve used salted butter
  • 2 eggs (beat with fork to mix)
  • 6-8 large, or 12 small, plums or pluots, halved and pitted (I like to use different kinds/colors for aesthetics and flavor)

Topping (optional):

  • a few spoonfuls of sugar mixed with 1 tsp or more cinnamon and (I added) cardamom
  • lemon juice

Preheat oven to 350F.

1. Cream sugar and butter until light.

2. Add eggs, one at a time.  Add vanilla and zest if using.

3. In a separate bowl, mix flours baking powder, and salt.  Mix in gently but thoroughly.

4. Spoon the batter into a buttered 9-inch springform pan.

5. Cover the top entirely with the halved plums, skin side up.  Sprinkle lightly with topping mixture and lemon juice.  You can skip the topping too.

6. Bake at 350 degrees for about 1 hour.  Remove and cool.  Remove sides of spring form pan but leave cake on the bottom part.  Refrigerate or freeze if desired, or cool to lukewarm and serve plain with vanilla ice cram or whipped cream (which Grandma prefers).

To serve frozen torte, defrost and reheat briefly at 300 degrees.

Yield 8 servings.

We're Competing badge

It’s been a rough week.  Sometime in the last few months, my grandmother was diagnosed with early-stage pancreatic cancer.  About a week ago, she wanted to give up.  She wasn’t eating enough or drinking enough.  She didn’t want the (mild but still unpleasant) chemo treatments anymore.  She didn’t want anything, or to see anyone.  She just wanted to close her eyes and be gone.

My grandmother is one of my heroes.  She’s generous to a fault, buying Costco chickens for a neighbor who likes them, and driving him to the senior center when he can no longer drive.  She mothers everyone, instantly delights small children, charms people who meet her.  She’s also a hell of a cook and a baker.

I didn’t know what to do.  I sent her a Rosh Hashanah care package: a card I’d painted, some photos from the summer, some apples, some honey, a honey cake.  I messed up the honey cake recipe (although don’t tell her; she actually told it to me wrong a few years ago), but I decided to send it anyway as a sign that she needed to stick around to help her granddaughter become a less incompetent baker.  Even while telling me she liked the package and still felt terrible, she still paused to tell me I’d done the honey cake wrong and try to figure out what I’d messed up.

Finally, I flew down to LA to see her.  This was a hard decision.  She said she didn’t want visitors; I was going against her wishes.  I’d stay somewhere else, drop in if she wanted me.  She said she didn’t want me to cook for her; her (amazingly wonderful) home health nurse was doing that.  She didn’t want me to bring her anything.

I saw her and at first she was negative.  She didn’t want me to think of her as anything less than vital.  But she’ll always be impressive to me, no matter what. This is the woman who just a few months ago, at 89, passed her driver’s test, was taking classes, was talking to vendors at her farmers’ market.  She’s amazing, however long she lives, however physically strong or weak she feels.

After we’d sat for a few minutes, she started asking me about my new house, my community.  She said she liked my dress.  She laughed when I thought of funny things to tell her.  She fussed over me.  She said it was good to see me.

Before I left today, I stopped at the Santa Monica farmers’ market and picked up all her favorite produce.  I stopped by her house to drop it off, made sure the tomatoes looked nice enough.  They did.  She thanked me for coming.

She’s feeling more positive again.  Trying rehydration.  Wanting food.  Tentatively retrying chemo.  I’m incredibly grateful.  Things will be what they will be, but the better she feels and does, the happier I’ll be.

A lesson in all this.  I show love through food, cooking for family, for beloveds, for dear friends, for strangers.  Each of these is an act of love.  I couldn’t cook for her here; I had to let go of that and just buy ingredients.  But what a joy to pick out the most delicious peaches, the best tomatoes, the nicest head of lettuce for my grandmother, to tempt her while following her wishes and letting her be in charge.  This is love.

Shanah tovah to those celebrating (and Eid Mubarak to those celebrating).  Sweetness and health to you this year.

Thanks to Josh Liba for the flickr creative commons picture.

(I’ve had some requests to revisit and repost this recipe from my old site [archive].  Here it is!)

A former roommate had a tradition of hosting pizza parties, at which she’d provide dough and friends would bring toppings.  I wanted to participate, but don’t eat gluten and try to limit my grain intake a bit.

Luckily, over at Low Carb Examiner, I spotted a recipe for a cauliflower pizza crust, the brainchild of Jamie VanEaton.  The crust is made only of cauliflower, eggs and mozzarella, with some optional herbs and spices.  No flour, no grains, no gluten.  I bought some cauliflower, mozzarella, and eggs, and I set to work.

It works beautifully.  It’s not bread, but it has the same kind of browned edges and foldable softness a doughy crust has.  Even better, it’s filling without giving me the bloated, tired feeling I get from eating all the white flour in a traditional pizza crust.  The cauliflower flavor is subtle and appealing.  It’s nice to have another cauliflower recipe, since I love cauliflower and frequently cook with it.

You don’t have to be gluten-free or even a cauliflower fanatic to adore this pizza.  I brought some sample slices out to the crowd of party-goers and asked for honest opinions.  Positive scores all around, especially on pizza 2.0 whose crust I allowed to get a little browner.

Everything in this pizza was local, except for a little olive oil and black pepper.

I’m impressed with the ingenuity and creative simplicity of a bunch of recipes I’ve found on Low Carb Examiner.  Jamie has a knack for coming up with low-carb versions of savory carb-heavy comfort foods, but without the kind of substitutes you see in some alternative-ingredient foods, like additives or processed ingredients.  She uses simple substitutes like cauliflower, which appears again in the tasty-sounding lasagna and enchiladas.  Also, check out her jicama hashed brownsnacho chips made of zucchini, egg and cheese, and a zucchini version of her pizza crust.

Cauliflower Crust Pizza: All local and gluten-free

For the crust:

  • 1 egg
  • 1 cup cooked, mashed cauliflower
  • 1 cup grated mozzarella
  • Optional: herbs or seeds.  The original creator of this recipe used fennel, oregano and basil.  I kept it plain and focused on the toppings.

For the toppings:

  • Mild tomato sauce or purée
  • Grated mozzarella cheese
  • Ricotta cheese, for small dollops on top
  • Assorted vegetables.  I used sautéed onions and chanterelles, fresh button mushrooms, basil, fresh small summer squash, and fresh tomatoes
  • Optional: olive oil, black pepper

1. Preheat the oven to 450 degrees.  (Mine was at 500 and worked fine; I was sharing the oven with other pizzas.)

2. Cook cauliflower until it’s soft.  Use whatever method you prefer: steam, boil, roast, pressure cook, whatever.  Mash it up with a ricer.  Mix in egg and mozzarella.

3. Grease a baking sheet or line with parchment paper.  If using a pizza stone, cover it in aluminum foil and then put down parchment paper.  Spread out your dough batter about 3/4 inch thick and eight or nine inches wide.  (I doubled the batter but still baked it as two separate batches.)  Let it brown, about 12-15 minutes.

4. Take it out and cover it with your toppings.  Bake again until crust edges brown further and cheese on top melts.  Serve hot.

Pictures:

The crust from the first version, although I preferred the browner second crust.

The first pizza:

The second pizza:

I’ve published a recipe for madeleines before, another gluten-free one using honey, almond meal and lavender.  They were tasty, low-grain, low-sugar, and full of delicious lavender from Sequim.

But the holy grail madeleine I was after kept evading me: the hazelnut madeleine.

I buy hazelnut meal from Holmquist Hazelnuts (U-district farmers market or Pike Place), and it’s my favorite thing to bake with.  It’s rich and almost chocolatey, fatty and tasty.

But every time I tried to make madeleines out of it, they came out too dry.  The hazelnut meal seems to be dryer than almond meal.

Finally, for a local foods French cooking workshop I did at my house, I came up with this recipe.  The proportions work beautifully.  The secret: More eggs.

Serve on their own, dip in cream (or cream mixed with honey/vanilla/rum/whatever you like), or dip in dark chocolate and allow to cool.

~

Hazelnut Madeleines (gluten-free)

  • 4 eggs
  • 1/2 cup hazelnut meal
  • 1/3 cup rice flour
  • 1/3 cup sweetener — sugar gives the best crumb, but honey or maple syrup also work.  (You can also reduce the sugar, but this is already pretty low)
  • dash of vanilla extract
  • dash of almond extract
  • 1/2 teaspoon baking powder
  • 5 Tablespoons butter
You need a madeleine pan to make this recipe.  Although you could also use the batter in a ramekin or something like that; it just wouldn’t be a madeleine.
.
1. Melt butter (microwave or stove top) and set aside while doing the next steps.
.
2. In a standing mixer, beat eggs on high until it starts getting thick and white, at least a minute.  Slowly pour in the sweetener and let it beat at least another two minutes.  Add the vanilla and almond extracts and let it beat another thirty seconds.  Your mixture should be very thick and pale.
.
3. In a separate bowl, mix together the hazelnut meal, rice flour, and baking powder.
.
4. Take the mixer bowl out of the stand mixer, and gently pour in the flour mixture.  With a rubber spatula, fold in the dry mixture to the egg mixture.  Then, drizzle in the butter, and very gently fold it in with the rubber spatula until it’s completely incorporated.
.
5. This is important: refrigerate the mixture for at least thirty minutes.  This changes the consistency of the batter: it starts getting firm and bubbly, the way a good mousse is.  This will help the shape and consistency of your madeleines.
.
6. When you’re ready to bake, preheat the oven to 400 F (about 205 C).  Butter your madeleine pan and sprinkle it lightly with rice flour.  Take your batter from the fridge and stir up any separated parts from the bottom.  Gently place spoonfuls of batter into the molds, just barely filing them.
.
7. Bake 8-10 minutes until they’re golden; watch them carefully.
.
8. Gently turn them out onto a cooling rack and let them cool only slightly before devouring them.

We're Competing badge

Western Washington residents know we’ve had some early-fall cold and wet weather this past week.  But in honor of the changing skies — today and tomorrow should be warm and sunny — I’m giving you an insistently summer salad.  It’s all stuff that should be at the peak of ripeness at the markets right now.

The motivation for this salad came from some wonderful fresh ricotta I’d bought from the Broadway Farmers Market (Willapa Hills).  We were looking for a bright, fresh side dish to an oxtail stew, and we were looking to do something with the ricotta other than just caving and eating the entire tub with spoons.  There were also very ripe tomatoes, and two contrasting colors of basil: Italian green and dark purple.

Inspired by picking a plum hanging over the sidewalk that took some acrobatics to reach (it was worth it), we decided to add some of the yellow plums we’d bought from Jones Creek Orchard, adding a sweet and tangy element.  Some sliced up fresh fennel for crunch and flavor, a sliced lemon cucumber, and a little lemon juice, olive oil and pepper later, we had a perfect summer salad.

Enjoy the upcoming warm weather, have a picnic, and eat like it’s still summer while you still can.

~

Insistently Summery Salad

  • Several very ripe tomatoes (at least some dark red, other colors great too)
  • Several very sweet yellow plums
  • 1 small, young head of fennel
  • A few sprigs green Italian basil
  • A few sprigs dark purple basil
  • 1/2 cup ricotta
  • 1 lemon cucumber
  • lemon juice, olive oil, and pepper to taste

1.  Cut tomatoes in wedges.  Discard stems.

2. Cut plums in wedges or slices.  Discard pit.

3. Remove outer layers and inner core (if not very young) of fennel.  Chop remaning white and fresh, crispy parts of green into thin slices.

4. Slice or chop lemon cucumber

5. Tear basil leaves

6.  Combine above ingredients.  Sprinkle with lemon juice, olive oil, and crumbled ricotta.  Stir gently to combine flavors.  Grate fresh black pepper on top.

Serve with any summer meal: Meats, fish, beans… Would go especially well with grilled tuna.

I wrote a few posts ago about some arguments for local eating, including the abundance of varieties we just don’t get from industrial-level agriculture.

Plant diversity means increased chances climate tolerance and disease resistance, (sometimes) extra nutrition, and lots of delicious things to taste. But I forgot to say one thing about those abundant varieties, which is that they sometimes look really cool.

Take summer squash.  You know about zucchini and yellow squash and patty pan.  But have you ever tried tromboncino?  Italian for “little trombone,” these guys, a curved-neck, slender, pale green squash, often reveal a remarkable flower pattern when you cut open the wide end:

Pretty, isn’t it?  They’re also really sweet, but not sugary sweet, and flavorful. And we’ve entered the time of year when summer squash is abundant, so I’m sharing one of my favorite, simple ways to eat them.

Yes, even the stunted plants that were unhappy about a long, cold June are finally producing.  Squash the size of baseball bats, squash the size of tiny slugs, all sizes and sorts of summer squash demand, “Okay, you grew/bought me.  Now what?” Marge Piercy had some suggestions in her famous poem Attack of the Squash People, but I’ve got another:

Breakfast.

We don’t often think of squash for breakfast.  It’s a dinner food, a lunch food, a sautéed on the side food.  But squash for breakfast is marvelous.  It cooks very quickly, and has a sweetness that is brought out when paired with breakfast sausage or, as in this dish, with eggs and a slightly bitter goat cheese.  Add some ripe tomatoes and you have a delicious, colorful breaakfast that takes about five minutes to prepare. Fast enough for a weekday, delicious enough for a weekend, and impressive enough to share.

One of many nice things about this dish: The squash can be used to sop up the extra egg yolk in place of bread.  The flavors are also really well balanced — a bite of tomato makes you want more cheese, a bite of cheese makes you want more squash, the squash goes well with a bite of egg…

If you don’t have tromboncino, this also works well with very young yellow squash.  You do want the small summer squashes for this dish, though.  Save the big ones for ratatouille or stew or something like that.

.

Tromboncino Summer Squash with Eggs, Tomatoes and Goat Cheese

1-2 squashes per person, depending on size

2 eggs per person

1-2 very ripe summer tomatoes per person

a few crumbles/slices of goat cheese per person, preferably soft-ripened, but fresh chevre will work too

Butter and olive oil, salt and pepper

1. Slice squash into pieces about 1/8″ to 1/4″ thick

2. Heat a bit of butter and olive oil in a frying pan that has a lid.  Add squash.  Sauté until soft.  Add a little more butter.

3. Crack eggs over squash.  Let cook about 30 seconds to 1 min.

4. Add a spoonful or two of water, and then cover with the lid until the egg whites are cooked but the yolks are still soft.  Transfer immediately to a plate.

5. Slice tomato on top in wedges.  Crumble on cheese.  Add pepper.  You can also drizzle on a little olive oil.

Seattle Local Food has been nominated Best Food Blog at the King 5 Best of Western Washington contest!

First, thank you to whoever nominated the site.  I really appreciate it.  If you’d like to vote for us, go ahead!  You can vote using this button:

We're Competing badge

(Second, as a fan of lolcat nerdiness, I always think “nominate” should be a verb for “to eat” as nom nom nom is the noise lolcats make when they eat.  So, perhaps nomination is a good thing to do for a food blog?)

I don’t know much about the contest — I think King 5 TV does a best-of series every year.  And apparently related categories to “Best Food Blog” included things like Dealerships, Jazz Clubs, and Ugliest Dog.  (Uh, does this mean I need to get a better profile picture?)

I think the site is a pretty good food blog, but I’m also not particularly competitive, to be honest.  Vote however you like.  I’ll give you what I think are honest pros and cons:

What Seattle Local Food has going for it:

  • Great recipes that are also really good for you
  • Pictures of delicious food
  • Food politics, like what’s going on with raw milk, or other things I hear about
  • Nutrition information and science
  • Interconnections: While other sites give you recipes OR nutrition research OR sustainability/food politics information, this site looks at the intersection, because they’re inseparable, and need to be realized as such.

The site’s challenges:

  • I don’t always blog regularly.  Life happens, school happens, family emergencies happen, anxiety about writing happens.  But I love it when I do it
  • I’m not a professional chef.  But I love to cook, I study health, I could spend hours at farmers’ markets, and I make delicious food that has led to marriage proposals (I haven’t accepted).  You get the recipes and the notes.
  • There are more comprehensive science-focused nutrition sites out there and I applaud them.  There are cooking sites with more recipes, more elaborate recipes, and even more drool-worthy photography.  I think that’s great.  And there are sites with information on sustainability, which is also great.  If you’d like to support one of those areas, without the interconnection, there are many great ones to choose from.

Anyway, there you have it.  Vote as you like, and thanks for reading and supporting!

Debs

I first learned to make this dish from an ex-boyfriend, who learned it from his grandmother in Provence.

But since then, I’ve cooked it for several friends from Sephardic Jewish backgrounds.  “Oh, nice fasolia!” they said.  It turns out that fasolia, or fasoulia (or I’m sure countless other spellings/pronunciations) is a traditional Sephardic dish as well, with roots in Syrian and Lebanese communities.  A little browsing online reveals that the dish is claimed in other countries as well: Italy, Turkey, Greece, and all over the Middle East.  There are versions with meat as well.

There’s a reason everyone wants to claim it for their own.

This dish is incredible.  It’s simple and relies on the flavor of very good ingredients.  The tomatoes stew to a perfect sweetness, embracing the garlic, swimming in olive oil, and then wrapping around flat, thin string beans (romano are best) until the beans yield and soften and soak in the tomato flavor.  I neither confirm nor deny the rumor that if nobody else is home, I might lick out the pan.

But usually someone else is home, because this is a dish that’s meant to be shared with people, too delicious to keep for oneself.  It’s probably my favorite thing to cook in summer.  Actually, you shouldn’t believe me when I say that; I’ll probably say (and believe!) that about whatever delicious thing I’ve cooked most recently, but of savory dishes I like to make in the warm months, this one appears on the table probably more than any other.  It’s easy and satisfying, and it relies on ingredients that are best at their peak of ripeness.

Although maybe this year I’ll freeze some tomatoes (you can freeze them whole and raw if you’re going to cook with them) and some romano beans and make it one day in winter for a treat.

The dish is very easy to make.  Give it the time it needs; the tomatoes really should taste sweet before you add the beans, and the beans really should get soft before you serve it. And don’t skimp on the olive oil.  Serve it with just about anything: salmon, meat, poached eggs, salad, crusty bread, barbecued chicken…

Invite someone over to impress.  And if they look at the dish and say, “Oh, nice __________” with a name you’ve never heard of from their culture, just nod sagely as if you knew, as if you wouldn’t claim the dish for any culture but theirs, and offer them seconds.

.

Fasolia: Stewed romano beans with tomatoes and garlic

  • Flat string beans like romano, about one pound.  It does work with regular ones, especially if they’re thin like haricots verts, but avoid thick string beans or thicker flat beans like scarlet runners — they take longer to cook and don’t work as well.
  • Garlic – about one head, peeled and chopped finely
  • Extremely ripe, deep red tomatoes – about two pounds
  • Olive oil – lots
  • Salt – to taste

1. Chop tomatoes coarsely.  Quarters or eights depending on the size.  Leave skins on.

2.  Put tomatoes into a wide-bottomed pot or deep pan that has a cover.  I like to use a stainless steel one for this.  Turn on the heat and let them steam a minut or so.

3. Add a few generous dollops of olive oil, stir, and cover.  Set heat to medium.

4. While the tomatoes are cooking, peel your garlic and chop very finely.  (Note: if you’re very slow at peeling and chopping garlic, do this in advance.)

5. Add garlic to tomatoes and olive oil.  Stir.  Sprinkle in salt until you can smell the tomatoes or it tastes right.  Stir, add a bit more olive oil, and cover.

6. Prep the romano beans — cut off the pointy ends, and cut any super-long beans in half.

7. Let the tomatoes cook until they taste sweet and have liquid bubbling all around them.  It’s important to wait for the sweet taste, or the dish doesn’t taste as good.

8. Add the beans to the tomatoes, and cover them with liquid and tomato bits.  Replace the cover.

9.  Cook until the beans are soft, stirring occasionally.  Seriously, do this even if you’re a al dente vegetable person usually, as I am.  The softened beans absorb the tomato flavor and meld into the dish.  As you stir, your tomatoes should be losing some of their water and occasionally sticking to the bottom.  Don’t let them burn, but this sticking is actually a good thing — scrape it with your wooden spatula, and it actually adds to the sweetness of the dish, mixing with olive oil beautifully.

10. When the beans are soft, turn off the heat, add more salt if needed (don’t over salt) and add more olive oil generously, at least a few dollops/tablespoons or more.  Stir in the olive oil and serve.

A New York Times article disparaging local eating generated a fair amount of buzz when it was published last week, mostly writing it off. I’m not surprised, since it contains a number of flaws in logic.

I encountered the article when an acquaintance rather triumphantly brought it to a local-foods themed Shabbat dinner potluck. No worries; as a Jew I see real value in debate as a means for sorting out nuance and complexity in order to find the best answers possible.

In this case, I’m not sure the debate is useful, because the arguments presented seem both weak and strangely angry. The author refers to local eating as “gospel” and “arbitrary” and “do-gooder dogma,” words meant to be both extreme and divisive.

This isn’t useful because it feeds a false premise, the idea that local eating is a trend, a fashion statement, something to believe in only to an extreme, a position which usually leads to rejection. Those with such a viewpoint will seek not so much a sound argument as, what this article felt like, a platform for someone looking for a reason to dislike local eating and not really caring if it is soundly argued or not.

Granted, there are people looking for a reason to like local eating and who don’t care if the reasons for doing so are soundly argued. Maybe they’ll keep doing it, maybe they won’t, but I imagine in the meantime they’ll have some good meals.

It’s important to be wary of anything being treated as a trend, whether you agree with it or not. That’s simply not, well, sustainable. We have a cultural addiction to the cycle of treating ideas as dogma to adhere to and then dogma to discredit. It’s how we approach everything from our habits to our relationships to our politics. It’s very consumerist and it doesn’t encourage nuanced thought.

In reality, people eat local food (partly, primarily, entirely, etc) for a variety of very sensible reasons. And if we sound fervent sometimes,well, so might anyone who has just eaten a proper ripe tomato or raspberry.

But this article’s author assumes we all think the same way, and that we don’t care how something is produced as long as it’s produced nearby. Here’s an example of one such meaningless generalization:

The result has been all kinds of absurdities. For instance, it is sinful in New York City to buy a tomato grown in a California field because of the energy spent to truck it across the country; it is virtuous to buy one grown in a lavishly heated greenhouse in, say, the Hudson Valley.

Really? Sinful? For someone using a headline about math lessons (although in his defense New York Times writers don’t generally create their own headlines), this is an awfully illogical statement, drawing a generalization without any scientific basis (something he also accuses local eaters of doing). “Sinful” and “virtuous” are divise words, sure, but they’re also puzzlingly over-applied. Also, the local-foods fans I know in New York City are happy to wait until summer to buy (or grow, like my friend Karyn in Astoria) their tomatoes, no greenhouse necessary.

The author’s other main premise is that the current food system is very efficient and that eating locally-grown produce will do little to nothing to reduce energy use. But he uses a lot of bait-and-switch arguments to defend this premise, starting when it suits him with one idea some people hold about local eating, pursuing it part way, and then switching to a different one when convenient.

He writes:

The statistics brandished by local-food advocates to support such doctrinaire assertions are always selective, usually misleading and often bogus.

A letter [first one on the page] published in response suggests the author’s numbers are actually misleading and bogus. The letter’s author points out: A recent Department of Agriculture study reported that 28 percent of food energy use comes from households while much of the rest — 57.6 percent — comes from the processing, packaging, transportation, wholesale and retail, and food service energy use that locavores are seeking to avoid.

The original statistics the article’s author discusses (brandishes?) are about calories of energy used in transporting food, energy cost of fertilizer, and so forth. But what he’s avoiding mentioning is that shipping is only one way in which absurdly-transported food (e.g. lettuce from 3,000 miles away when it’s grown 30 miles away and picked fresher) uses more energy. It’s true, one head of lettuce doesn’t use much more energy when it’s from California, but what about thousands of heads of lettuce? And fertilizer, while it may be an energy issue, is not primarily that — non-organic fertilizers can be detrimental to soil and water, and limit long-term sustainability of farm land.

Picking one angle (exact amounts of fuel used to transport food) and massaging numbers is misleading.

Local eating is and should be nuanced. Certainly, we can’t say for sure that the entire food system as it’s currently structured should be dismantled. But the movement toward supporting small, local farms using sustainable (organic, low energy, crop-varied) means of production is simply a very good idea. This is true whether you buy more produce from the place you live when it’s in season, or eat entirely locally-produced food, or anything in between.

Why? The reasons are as varied as summer produce. Here are just a few:

~ Produce shipped across the country is often (but not always) grown on very large-scale farms, sometimes owned by larger corporations. It’s like anything in our economy; while some families own and responsibly operate large farms that sell to distributors, there are many more instances of mom-and-pop operations bought up by larger companies. Growers lose economic and decision-making control over their farms, or lose their farms entirely.

~ Centralization isn’t a great idea when it comes to what we eat. This becomes apparent every time an outbreak of food-borne illness spreads rampantly throughout the country, from one distributor or large-scale grower. It’s also not a good idea to yield control of our food supply to a small number of companies.

~ Produce shipped across the country was probably not picked this morning, like the food I buy at my farmers’ market.

~ The produce at the farmers’ market usually tastes better, is riper.

~ Small-scale farmers are generally very good at what they do, and passionate about growing the best food they can, interesting varieties, and food that tastes good.

~ Local food at a farmers’ market is not subject to certain industrial regulations that don’t make sense, like requiring apples to be perfectly round. Such standards result in a great deal of food waste in this country (although some large producers encourage gleaning at their farms, or use other methods to attempt not to waste this food). Small producers can choose breeds for delicious flavor rather than shelf-life, transportability, color and so forth.

~ Some locally-produced, small-scale food is more nutritious. Produce grown in rich, healthy soil. Meat, dairy and eggs from animals on pasture on a small farm, not cooped up in cages or feedlots. It would be funny if it weren’t maddening to hear this argument disparaged by those who assume the argument is that any food produced locally is more nutritious.

~ We can save cross-country shipping of produce for areas where it’s really necessary or beneficial. I’m actually all for shipping citrus fruits in winter; they give us vitamin C and they’re a lovely break from winter foods. They’re also not going to supplant local fruit, although honestly I’m pretty content eating dried and frozen summer fruit through most of the winter. Peach pie in February does use freezer energy, but it also makes me really happy.

~ I like to think long-term. If we want farmland to be preserved, and varieties of produce to be preserved, we should support the people running those farms and growing that produce now. This may be especially urgent as climate changes; we may need to rely on crops that do well in a particular area or are tolerant of heat/cold/drought/etc. While I’m sure Monsanto would be happy to develop and patent some for us, I’d rather we not lose any more varieties that already exist.

Deceptively, the author suggests the amount of farmland in America is virtually unchanged. But the number of farms has been reduced drastically, and much existing farmland is now used to grow grains for unhealthy products like high fructose corn syrup, corn oil, white flour, etc.

I guess I’m not sure why the author wrote an article that seems bitter to the point of something personal going on. But if it gives local food appreciators a chance to reiterate that our reasons for eating what we do are based on science, math, economics, community benefit, and taste buds, we’ll take it.

Feel free to try calling it a trend, but barring any weather disasters, I don’t foresee a summer where I’ll say, “Oh, ripe summer tomatoes? Those are so last year.”

There are some recipes that should remain unaltered.

These are generally the recipes that are a combination of  memory-entwined, delicious, and very simple, so that a single change would transform the nature of the dish significantly.

This view is a departure from what I wrote in my last post, about finding the freedom to experiment with som tam beyond the original formula I’d learned in a Chiang Mai market.  But som tam’s essence is from the unalterable parts, the lime and garlic and fish sauce and touch of sugar, and the fruits and vegetables are a vehicle for those flavors, a canvas with their own subtle characters.

The dish for today’s post has only five ingredients, and together they taste just so.

This recipe is from my friend Tom, who came to visit Seattle for a few weeks.  Similarly passionate about food, we cooked a number of outstanding meals together, collaborating and teaching each other a few of our favorite things to cook.  He was in love with these fava beans, insistent about each step of the cooking process being just so to produce a simple, harmonized, memory-enriched taste.  It worked.  And they were marvelous.

The dish comes originally from the Sephardic Jewish community of Aleppo, Syria.

The recipe is very simple.  The ingredients: favas, olive oil, garlic, coriander and salt.  And a bit of water for the cooking.  There is no such thing as too much garlic in this recipe (Tom said he couldn’t conceive of such a thing, and I suggested a pile large enough to crush you might be pushing it, unless carefully maintained).  The coriander, a dried spice, is best if fresh-ground and good quality, like the stuff available at World Spice.

It has taken me until this year to become comfortable with fava beans.  For all their charm, they come with a bit of baggage.  First, their most notable entrance into American pop culture remains when Anthony Hopkins’s cannibalistic character in The Silence of the Lambs mentions eating a human being with fava beans and a nice chianti.  Then, there’s that rumor about the peel.  Don’t they come with some very difficult peel?  Doesn’t it take power tools to remove it?  Are they even worth it?

No on the power tools and difficulty, but about whether it’s worth doing: Yes, yes, yes, and oh ever definitely yes.  They’re buttery, subtle-yet-complex in flavor, just the right kind of soft and chewy, tender.  They’re very agreeable; this dish of favas works just as well next to some lamb or mutton as it does paired with a light summer salad and soup.  They’re favas you’ll fall a little in love with, and want to make repeatedly.

First, a note about peeling.  Tom points out that the peeling must happen –– for reasons not just social but about the taste and integrity of the beans! –– while sitting around having Grandma gossip or neighbor gossip or some kind of slightly-scandalous discussion, chit-chat, banter, or revelation of family secrets.  Preferably on a porch. Rocking chairs wouldn’t hurt either, if you want to be on the safe side.

The peeling is actually kind of fun.  Yes, there are recipes that involve blanching the beans to make the peeling easier, but let’s forget that for the moment.  First, let’s entice you by show how pretty the beans look while they’re being peeled:

Interested?  Good.  Now, let’s make you wait a bit more to hear about the peeling and talk about the selection of favas.

The most exciting time to cook favas is early in the summer, or when the crop is fairly young.  I’ve been lucky enough to find some young-ish favas even through August here (Nash’s Organic has had really nice ones).  You can use any favas for this dish, but in a moment we’ll learn why young ones are the best.  These pods are thinner, brighter green, firmer, and have fewer brown markings.  There is less of a string to pull, or no string if it’s very young.

When you open the young-ish pod, it looks like this inside:

Very soft, white, almost furry.  Tender and… delicious.  Yes, that’s right, you can eat bits of the pod when it’s this young, and you should rip off the nicest pieces and throw them in the bowl.  As the season goes on, you are less likely to be able to do this.

Now, what about that extra layer to the bean?  Here’s a secret: the youngest ones don’t need the extra layer removed.  Sacrilege!  But true.  For my taste, anyway.  Older, grown-up beans have a thin, pale-green or white-ish waxy layer that can be removed very carefully with the thumb nail to reveal a brightly colored bean inside.  But there are some beans so young that when removed from the pod, they barely have this layer at all, and are pretty bright green on the outside already.  Leave them.

Okay.  We’ve talked about grandma gossip, we’ve talked about selecting favas, we’ve talked about peeling… You’re ready to cook.

Fava Beans with Coriander and Garlic

  • Fava beans — about 1.5 pounds for a side dish, but you can make this dish on an enormous scale and it works well.
  • Garlic — there is no limit.  I used two heads for my 1.5 pounds of favas, but then again I was running out of time.
  • Tom’s grandmother uses seven cloves.

  • Coriander, dry, fresh-ground — To taste.
  • Olive oil
  • Salt (added at the end only!)
  • A bit of water

1.  Peel favas.  See notes above about pod age, whether the bean needs the waxy layer removed, and the necessity of grandma gossip.  Save bits of any very soft, tender, green pods, and tear them into your bowl.

2. Chop garlic.  Roughly, finely, however.  Just have plenty of garlic.

3. In a large pan (like a cast iron skillet) heat olive oil.  Add favas, peel bits and garlic.  Stir for a minute to begin cooking.

4. Add the coriander, so that it merges with the oil and its flavor is brought out. Be generous; it should make the dish brownish. But since you are NOT actually frying these favas…

5. Add a bit of water.  Note that you are also not boiling the favas.  You want just enough water to pool around the beans and let the top halves poke up through the liquid.  I started with a cup of water, and also added a little extra olive oil for flavor.

6.  Let it cook, stirring and resisting any temptation to add salt yet.  If the water runs out, add more.

7. When the favas are cooked, they are soft, wrinkly, a little grey-ish, and not at all mealy.  The water is nearly all cooked off.  At this point, add salt to taste.

Serve on their own, with summer foods, or with grilled/broiled meats like mutton or lamb… which is, uh, now that I think of it, silent.  Hold the chianti.

My love for Thai food stems mostly from a college semester I spent living in Chiang Mai, a small, beautiful city in the north of Thailand with spectacular food.

It took a while for me to love the food rather than just like it.  Tiny, incredibly hot chilis looked deceptively like mild string beans as they floated in bowls of soup, until I picked them up and munched on them.  My host sister, Kei, liked introducing me to foods like congealed blood in curry (“It’s like jelly!” she said, helpfully.) Fish sauce was weird.

But the complex flavors drew me in, and the spiciness became an asset, and then a necessity.  Spicy Northern Thai foods gradually burned off my taste buds, and rewarded me with extra flavor, until I just thought it was normal for my eyes and nose to run at every meal, and I couldn’t taste food that wasn’t spicy.  My friend Phueng promised me, as she sprinkled extra fish sauce with hot chilis onto our fried rice, “You’ll miss fish sauce a lot when you go back to America.  It’s where all the delicious flavor comes from.”  She was right; fish sauce is the main source of umami in Thai foods.

There were so many favorite dishes, using fish sauce to enhance sweet, sour, spicy, subtle and powerful flavors.   The curried, fishy khanom jean, served over soft, fermented rice noodles.  Kao soi, an addictive, spicy red curry noodle soup with pickled vegetables and chicken.  Gai yang, the tangy barbecued chicken sold at the market near where I lived.

Gai yang is meant to be eaten with sticky rice and pinches of som tam, a tangy salad of shredded green papaya pounded in a large mortar and pestle with lime juice, fish sauce, tomatoes, garlic, green beans, chilis and sugar (hold the peanuts, eggplant and shrimp, please).  I bought som tam daily from a woman who set up a little folding table at the edge of the market, and pounded som tam in her mortar and pestle, assembled to order.  I ate it picnic-style on the floor with friends P’Nu Dang and P’O, barely noticing the spice as my eyes ran with happy tears.

Like most converts, though, I made the mistake of thinking that formulas, or recipes, were unalterable doctrine.  Som tam was made the way the woman in the market made it, and so I could never make som tam in America; where was I going to find green papaya?  Or a large-enough mortar and pestle?  Besides, I like to eat local produce as much as possible; nobody in Washington State grows green papayas.

Then, here in Seattle, I went to my Thai friend Sani’s apartment for lunch, where she and her friends served me carrot som tam with fresh tomatoes.  Carrot som tam!  The flavors tasted just right, even though with its bright orange color it looked nothing like the pale green mixture that the woman at my Chiang Mai market made.  “Sure,” Sani and her friends assured me.  “You can make som tam out of anything.  Apples, vegetables.  Fruit som tam, som tam polamai, is really popular.”

I was inspired.  I went home and pulled CSA carrots and yellow summer squash out of my refrigerator.  An apple that had to be used up.  Some romano beans.  Some tomatoes.  A lemon cucumber.  And set to work.

Som tam has two kinds of vegetables or fruits: the ones you shred for the base, and the ones you chop and pound when you add them in.

The shredding is best done with a food processor top-blade or mandoline, something that’s going to keep the shredded strips fairly intact and stiff, so they can retain some shape when they’re pounded.  Just a word to the wise if you’re using a food processor: Pay attention to how much you’re shredding.  I blithely threw in four enormous carrots, an apple, and two squashes and it made a lot more som tam than I was expecting.  But it was so good, there was very little left in the bowl.

.

Local Vegetable Som Tam (Thai shredded salad with lime)

Shredding vegetables/fruits — use any mixture of:

  • 2-3 carrots (any color; mixed is pretty.  Carrots make a great base for som tam, with other things added in)
  • 1 apple and/or very firm pear
  • 2 summer squash (yellow squash, zucchini, etc)

You may substitute in vegetables like:

  • 1-2 young turnips
  • 1-2 radishes (mixed with other things; a bit too strong on their own as a base)
  • 1 large or 2 medium golden or chioggia beets, ideally mixed with apples or carrots

Added vegetables (not shredded)

  • 2-3 tomatoes, cut in wedges
  • 1 cup string beans or romano beans cut in 1-2″ pieces
  • 1 lemon cucumber, in slices or wedges
  • Other additions — you can add any fresh summer vegetables or some fruits like peas, snap-peas, eggplant, cucumbers, plums (the tangy flavor would be great)…

Added flavors

  • 2 T or more fish sauce / nam pla (to taste)
  • Juice of 2 limes
  • 2-4 cloves garlic, pressed and then chopped fine
  • 1-2 T sugar or honey (to taste).  Palm sugar, which isn’t very sweet, is traditional.
  • 1-7 Thai chili peppers (to taste)

(Optional: traditional som tam also has dried shrimps and peanuts, but due to allergies and dietary restrictions, I left both out.)

Tools

  • Something for shredding — I recommend a food processor with top shredding blade or a mandoline
  • A wide bottom bowl and a heavy glass or mug, OR a very large mortar and pestle.

Directions

1. Shred all your shredding vegetables/fruits.  Set aside.

2. Chop your chilis and garlic.  (A tip for avoiding getting the oil on your fingers: Hold the stem in your fingers and use a good pair of scissors to cut the thin slices into your bowl.)

3. In the bottom of a wide bowl or a very large mortar, use a pestle or heavy mug/glass to pound your sauce of fish sauce, garlic, sugar, lime, chilis.

4. Chop tomatoes, green beans, and any additional vegetables.

5. Mix your shredded vegetable and additional vegetables into the sauce.

6. Pound the entire salad.  You’re bruising and breaking down some of the structure of both the shredded and the chopped vegetables, which allows the flavors of the sauce to permeate.  This is fun and cathartic, and makes the salad taste better.

7. Taste and adjust the flavorings as desired.  You want the lime to make it very tangy, the spice to wake you up, the garlic to make your mouth water.

Serve plain, with jasmine rice, or with barbecued chicken (gai yang) and Thai sticky rice.  A wedge of sweet cabbage also compliments the spiciness nicely.

Thanks to the Seattle City Council, it’s now legal to have up to eight chickens in Seattle!  No roosters, which is probably a good compromise, considering their tendency to be rather vocal.

The new bill, described here, also expands urban farming to be allowed in all zones, with some limits in industrial areas, and makes more room for farmers’ markets, rooftop gardening, and selling home-grown food.

In a lot of ways, the bill is catching up to what residents are already doing.  At last month’s backyard chicken coop/goat pen tour, I spoke with a number of residents who weren’t sure anymore what the legal limit of chickens on a property was, but thought they’d heard it had gone up.  I’ve seen many houses with more than three chickens (the previous limit).

Still, score another point for backyard farmers and gardeners.  And go count your chickens, hatched or otherwise.  My housemates/community and I plan to celebrate by building a coop.

Photo of chickens via Creative Commons.

I’ve always been fond of Thai basil chicken.  The mixture of ground chicken, garlic, fish sauce, basil, chilis, vegetables and lime is outstanding. I’ve also always adored tod mun, little fried cakes (usually fish) served with dipping sauce in Thai restaurants. And finally, I’m developing a bit of a thing for breakfast sausage patties, but I don’t eat pork, so I usually make my own.

It was time for these three tastes to converge.

I thawed a pound of ground chicken from Stokesberry Sustainable Farms.  They sell at a lot of our local markets and have inspired me with their own really tasty chicken breakfast sausage patties to make my own.  The flavors of Thai basil chicken come out in this recipe.  Serve them for breakfast with fried eggs, or as an appetizer or dinner with dipping sauce or rice or vegetables or cauliflower.

Thai Basil Chicken Breakfast Sausage Patties (Tod Mun Kraprao Kai)

(yields 12-16 small patties)

  • 1 lb ground chicken
  • 1 egg
  • 3-4 tablespoons coconut flour or rice flour (optional)
  • 2-3 thai chili peppers (Tip: if you can only find fresh Thai chilis in a larger quantity than you’ll use in the time they’d stay fresh, freeze the rest and take them out as you need them.  Works great with lime leaves too.  Speaking of which…)
  • 2-3 Thai lime leaves/kaffir lime leaves
  • a pinch of white pepper
  • 1-2 cloves garlic
  • 1 small onion to 1/4 large onion
  • 2 carrots
  • large handful or three of basil leaves
  • zest of one lime
  • juice of 1/2 lime
  • optional: a little Thai panang or green curry paste for extra flavor

1. Chop onion, garlic and carrots very small.

2. In a large bowl, mix chicken, egg, flour, white pepper, and vegetables.  Add a little Thai panang or green curry paste if you’re using it.

3. Cut up lime leaves and peppers directly into the mixture.  I always cut both of these with a pair of scissors because it makes it ridiculously easy and you don’t get chili oils on your fingers.  Waiting until you’re ready to let the pieces fall right into whatever your cooking also helps you avoid touching the cut bits.

4. Zest in the lime, and squeeze in half its juice.  Stir again.

5. Wrap up the bowl and stick it in the fridge for 12-24 hours to marinate (you can skip this is you really want to eat this NOW).

6. Notice I haven’t mentioned the basil yet?  Chop the basil finely and stir it in, so it’s nice and fresh.

7. Make it into small patties and freeze them on a baking sheet.  Once frozen, store them all in a freezer bag.

8. When ready to cook, heat up some coconut oil, schmaltz or high oleic sunflower oil.  Fry on each side directly from the freezer until brown.

I’m generally a fan of lightly cooked vegetables instead of soft ones, particularly in spring, but there are exceptions.  This dish is one of those exceptions.  The flavors meld together beautifully, especially as they absorb butter and cream.

The most common gratin is a potato one: layers of potatoes absorbing cream and onion and flavor, mixing with melted cheese, and getting nicely golden on top.  There’s a lot of appeal in this, but the potato isn’t doing much to add flavor.  Improvising gratins from other vegetables makes for a more flavorful and nutritious dish.

For this gratin, I used some of my favorite summer vegetables: asparagus, peas, small spring onions, and a few morel mushrooms.  With a lot of butter, some cream, some sheep’s milk cheese or gruyere (or whatever you have on hand) and parmesan on top, it’s extraordinary.  Serve it plain, with a poached egg, with a salad or chilled soup, or as a side to grilled or roasted meat.

Spring Vegetable Gratin with Poached Egg

Proportions are per person — make this in individual pans or as a larger gratin

  • butter for cooking (plenty!)
  • 1/4-1/3 lb fresh asparagus
  • 1/4 cup fresh peas (frozen are ok)
  • 4-5 morels
  • 2 small spring onions or 1 medium/small one
  • about 1/4 cup cream
  • a few ounces of cheese, like sheep’s milk or gruyere
  • parmesan, salt
  • small amount of chopped Italian parsley (optional)

Preheat oven to 400F

1. Chop all vegetables finely, and thinly slice cheese.

2. In a small oven-safe pan, sauté onions in butter, with a bit of salt, until soft and clear.  Add morels, optional parsley, and more butter until morels cook through.

3. Add asparagus and stir.  Wait one minute and add peas.  Stir and turn off the heat.

4. Pour in just enough cream to almost, but not quite, cover.  The top layer of vegetables should be sticking out.  Gently fold in sliced or crumbled cheese.  Grate parmesan on top.

5. Cook 30 minutes at 400F

6. When almost done (top is golden/brown when done), poach an egg to serve on top.  Bring water to simmer in a small pot.  Add a dash of vinegar.  Add in cracked egg (some people pre-crack it in a bowl) and do not touch while it cooks.  After a minute or so, gently scoop it out with a slotted spatula or spoon.  Place on top of the gratin and serve.

So, I’m slowly coming up for air after a month of travel and finishing up my MFA.  I have a few things left to do this week, and then the MFA is complete and I can focus on the MPH for the next year.  And, of course, get back to blogging!

Today I displayed a poster at the UW’s Maternal & Child Health/School of Public Health research festival, based on a few projects I did last year.  You can download a higher resolution pdf of my poster here: CapstoneDGcopy. (NOTE: due to some error in the file, some people get something scrambled/random boxes instead of the correct image.  Working on fixing this.)

The poster is based on my critique of an intervention trial called Pathways published in 2003 in the American Journal of Clinical Nutrition. (Full text)  In this intervention, over 1,000 predominantly American Indian school kids in schools spent grades 3-5 receiving what the researchers thought would reduce or prevent obesity: reduction of saturated fat in the diet, exercise in school, and education of kids and their families about these principles.  At the end of the intervention, saturated fat had indeed been reduced in the intervention schools, as compared to the control schools.  But not one of the measures of obesity was any different from the control schools.

What did the researchers do?  Well, a great deal of money probably went into the study; a whole supplement issue of AJCN was devoted to the preparation for it in 1999.  Whether to save face or their attitude was genuine, they concluded the study was a partial success, in that they had reduced dietary fat, even if it hadn’t actually affected obesity.

It makes sense that their intervention didn’t reduce obesity; saturated fat doesn’t cause obesity.  Looking at a population level from USDA data (which is, admittedly, imperfect, but makes sense in this case), saturated fat isn’t what’s increased significantly in our diets during the obesity epidemic.  Corn sweeteners and vegetable oils have, as have grains to some extent.  Further, traditional American indigenous diets have focused on animal foods high in fats and fat-soluble vitamins.

Meanwhile, fat-soluble vitamin deficiency continues to be a concern; we move animals off pasture and lose naturally-occurring forms of vitamins A, D, K2 and omega-3 fatty acids that are found in the fats of animals eating what they’re meant to eat (not grain).  We reduce saturated fat, switch kids’ lunch beverages to skim milk and juice instead of whole milk, and we contribute to the deficiency problem.  Additionally, vitamin deficiencies have a bi-directional relationship with obesity.

So what do we do instead?  Interventions that make sense: reduce sugars, carbohydrates and vegetable oil in diet.  Focus on vitamin deficiency as related to obesity prevention and intervention.  Focus on traditional diets and family involvement that isn’t condescending: learn from people what foods have been traditionally protective in their communities, instead of telling them information about how to eat that is not having an effect.  Increase exercise, but increase it outdoors with vitamin D exposure from sunlight (in non-winter months especially) and where kids can move about in and interact with a natural environment.

But to continue repeating the same mistakes and covering our footsteps when they don’t work?  It’s not only ineffective; it’s harmful.  Kids, and adults, deserve better.

(Since I’ve had a request, if you’d like to read it, my original critique of the Pathways intervention is here: health promotion critique DG )